Before we get started...
Everything included in this guide would not be possible without the amazing work by Otter, so if you find yourself able to do so, please donate to him or sign up for his Patreon. He deserves it.
Lightless makes Otter's work possible to be seen by anyone you are synced to, so if you want to show them your support, please do so. Zura is a good dev, and has made a good successor to Mare, so donate if you can. Subscribing to Zura also gives you a Vanity role on Lightless!
I have also started a Patreon, and by supporting you help me to be able to worry less about reality, so I can focus more on the guide. You can also send me tips or sign up for my Ko-Fi as well!
One more thing...
All of the plugins provided in this guide can be downloaded from the same repository. Once you have XIV Launcher installed and have Dalamud enabled, go to Experimental, scroll past the Dev Plugins section and find the Custom Plugin Repositories section.DO NOT PUT THE REPO IN DEV PLUGINSPut this link in the first open field that you have link in the picture.https://raw.githubusercontent.com/Ottermandias/SeaOfStars/main/repo.jsonThis repository will also help you install other plugins used in this guide. It's good to start with Penumbra as other plugins depend on it. Once you have Penumbra set up, installing Glamourer would be the next step as Mare Synchronos requires both to work. From there, you can search for any of the other plugins as desired.
You can access the Experimental tab by hitting ESCAPE, going to Dalamud Settings, then clicking on the Experimental Tab. You will scroll down past the Dev Plugins section to get to the Custom Repo Section the Sea of Stars repo needs to go into.

Penumbra Setup and Basics
Inheritance
Advanced Penumbra Features
Misc Guides
Glamourer
Advanced Guides
Lightless
About Me/Discords
About Serenity
Hey everyone! Feel free to call me Reni! I know a lot of you use this, and I really appreciate all the positive comments! Just wanted to give you all a little info about me! I am a sexy wolfo that likes to help people out, and want to do all I can to help people be the person they want to be!Feel free to message me if you see me on Discord, or click my links to support me in other ways!Also, as big supporters of the site, please make sure to check out the Veemonheim community on their website and Discord server!
My Saviors
Those listed below have chosen to help me and I appreciate them so much! Thank you for choosing to support me!
I give kisses! ($5 Tier)
Chuf
Life Saver ($10 Tier)
Bianca Hiebl
Nylfae
Cloneme5
How to Redraw
In order for a mod to be enabled, you either need to equip the item, or if it is already equipped, redraw to enable the mod to work. But how do you redraw? Let's get into it!
Make these three commands into macros. You will use them a lot, so you can thank me later.
/penumbra redraw self - Redraws your character
/penumbra redraw target - Does the same thing, but for your target
/penumbra redraw - Redraws EVERYONE in your instance
What are collections?
Collections allow you to set up a character or a specific types of characters with specific mods, so they have mods on but not everyone does.They can make it so certain looks, or even certain mounts, animations, minions, or other assorted things are personal to you and not shared to everyone.
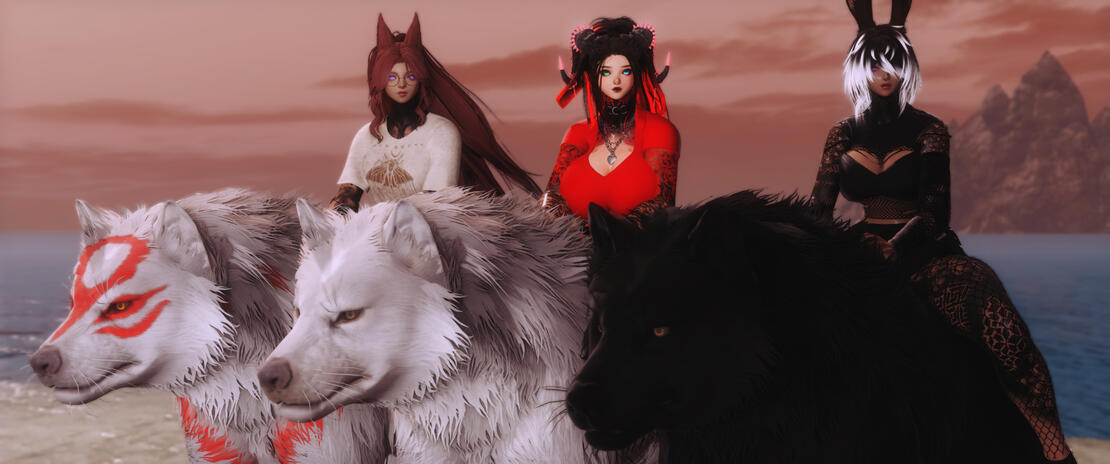
Take for example, the pic below. I am on the bigger best boy Torgal, but my friend Kuny is on the same mount, but black, and my friend Ather is on a kitsune version! It's pretty neat!
So, what are Group Assignments?
Group Assignments allow you to set up a collection based on a group of people. This could be one for all of your characters, or for a specific race, or even all player characters or NPC's.
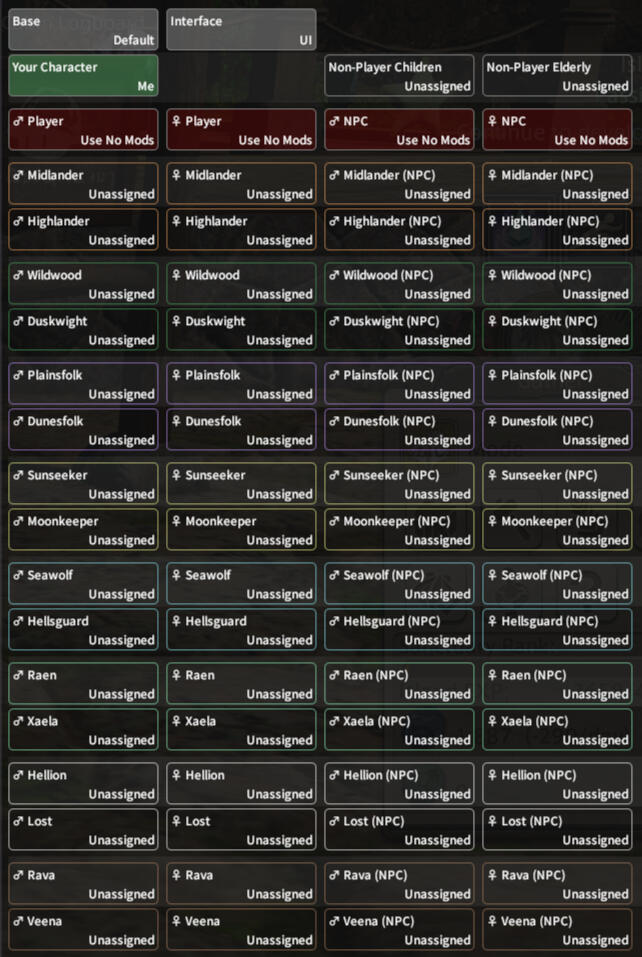
Ok. I think I got it...
Now that we established what collections are and given a basis for what character groups are, let's get into how to set them up. And the first thing you need to do is...
Step Three
How do you play?
Do you only have one character or have numerous alts but you generally use the same stuff, or do you like to specify and pick different things for different characters? Do you want to assign all of a specific race and gender their own collection?
Step Three
Set up your character
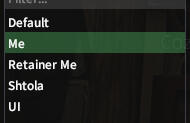
Go to the Collections Tab, click the + and name your collection. I like to use "Me" as a name as all my characters will be played by me. This will create a collection in your list.
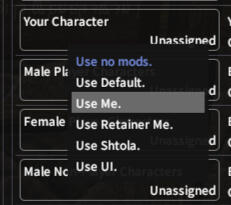
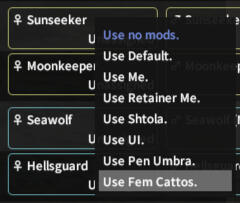
Then, under Simple Assignments, left click on Your Character and choose the Me collection! And you are done!


Step 3 - A
Set up your character
Go to the Collections Tab, hit the + and name your collection whatever makes sense for the character/NPC you are making the individual collection for.


Step 3 - B
Set up your character
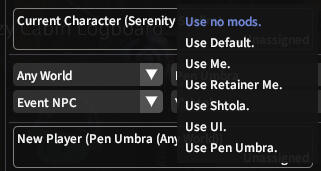
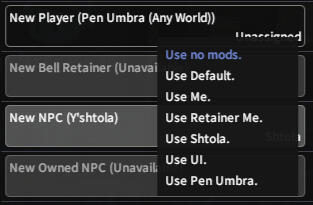
Then, look under Individual Assignments and either left click Current Character and assign the collection you made, or type the name of the player character you want to make a collection for, then left click New Player/Bell Retainer/NPC/Owned NPC and assign the specific collection. After you have entered the named of any characters/NPC's, you can also edit the collection used under Simple Assignments as well.
NOTE: You can have it for all servers, or a specific one. You can also make a selection between battle NPCs, event NPCs, companions, mounts, or accessories. Then, you can look through the list or search for the NPC or object you would like the collection for.

Step 3 - A
Set up your group
Go to the Collections Tab, hit the + and name your collection whatever makes sense for the group you are making the group collection for.


Step 3 - B
Set up your group
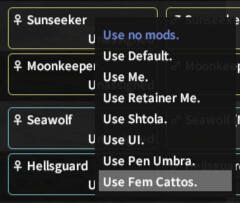
Then, look under Group Assignments, and left click on the Group you want to assign, and assign the specific collection to that group!
Step 4
Enable the mods for your new collection

Now go to the Mods tab. Go ahead and make sure to check the "Enable" checkbox is checked. Once you do, you can redraw and see if the mod is working for you.
Check Collection Details
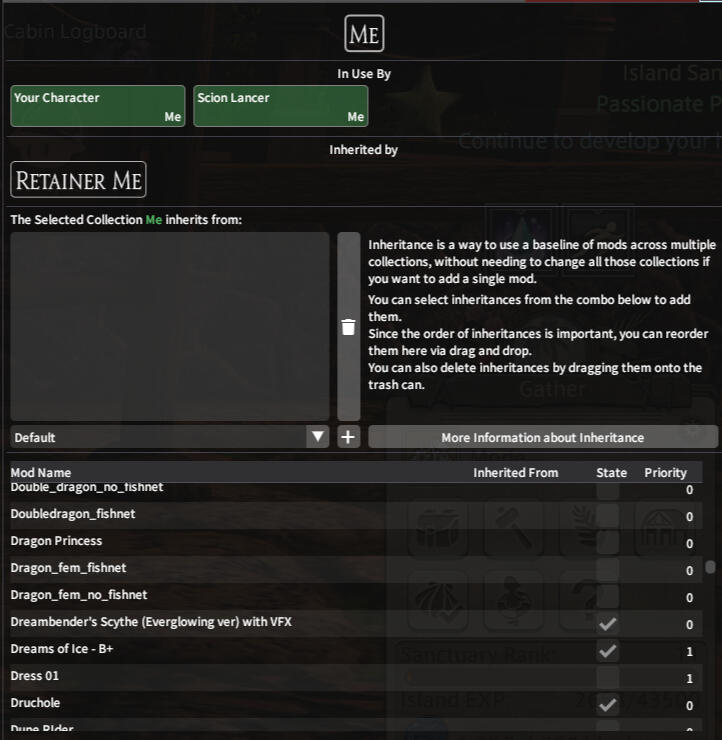
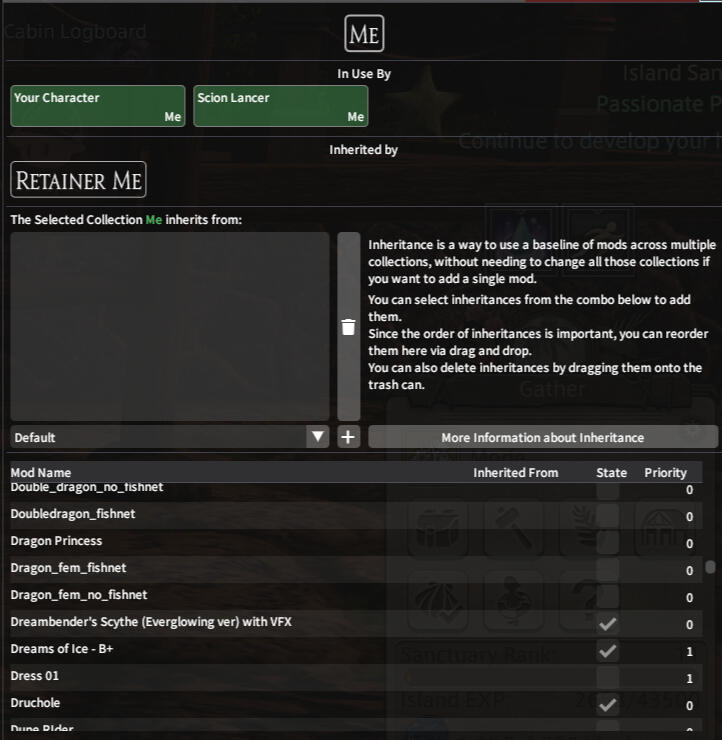
If you want, you can click on Collection Details, and it will show all relevant information needed about the collection, including who it is assigned to, and any mods enabled and at what priority!
Step 6
And you're done!
Feel free to repeat the process if you need to make any additional assignments for other characters/NPCs/groups!
How to use Collections
Let's get into how to make it personal!
What are collections?
Collections allow you to set up a character or a specific types of characters with specific mods, so they have mods on but not everyone does.They can make it so certain looks, or even certain mounts, animations, minions, or other assorted things are personal to you and not shared to everyone.
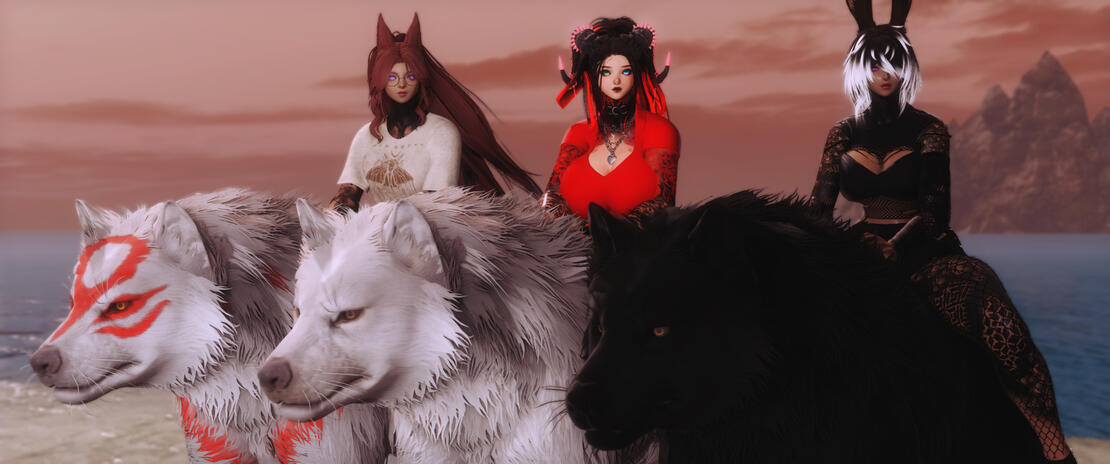
Take for example, the pic below. I am on the bigger best boy Torgal, but my friend Kuny is on the same mount, but black, and my friend Ather is on a kitsune version! It's pretty neat!
So, what are Group Assignments?
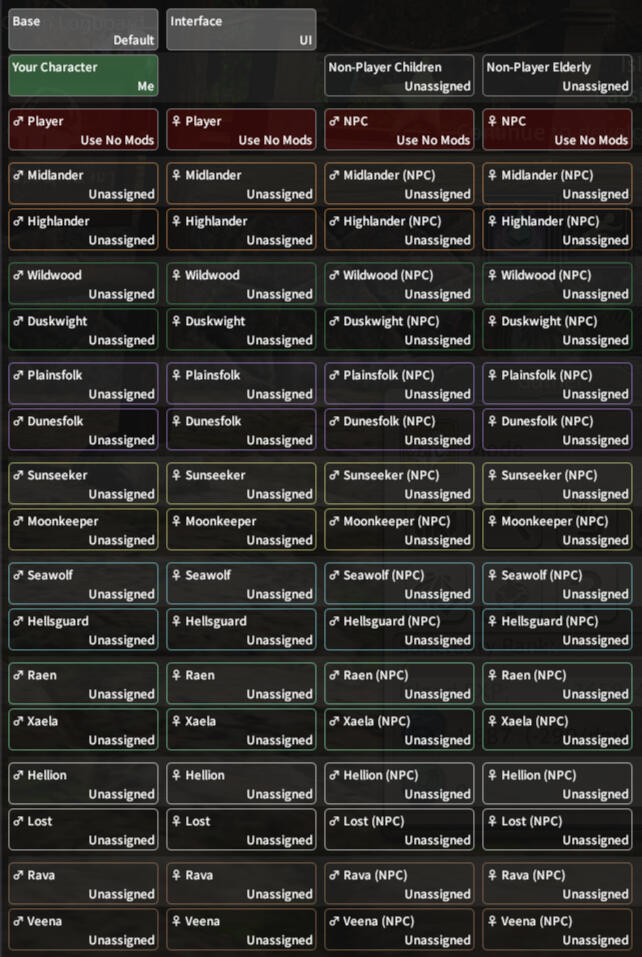
Group Assignments allow you to set up a collection based on a group of people. This could be one for all of your characters, or for a specific race, or even all player characters or NPC's.
Ok. I think I got it...
Now that we established what collections are and given a basis for what character groups are, let's get into how to set them up. And the first thing you need to do is...
First Step
Install Penumbra
You kinda need this in order to follow the rest of the guide.
Second Step
Navigate to the Collections Tab
You can see it to the left of the Mods tab

Step Three
How do you play?
Do you only have one character or have numerous alts but you generally use the same stuff, or do you like to specify and pick different things for different characters? Do you want to assign all of a specific race and gender their own collection?
Step Three
Set up your character
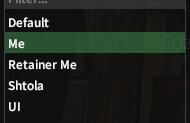
Go to the Collections Tab, click the + and name your collection. I like to use "Me" as a name as all my characters will be played by me. This will create a collection in your list.
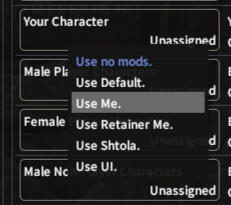
Then, under Simple Assignments, left click on Your Character and choose the Me collection! And you are done!


Step 3 - A
Set up your character
Go to the Collections Tab, hit the + and name your collection whatever makes sense for the character/NPC you are making the individual collection for.


Step 3 - B
Set up your character
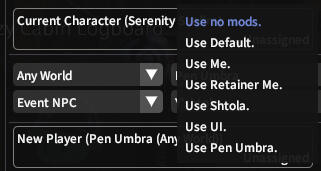
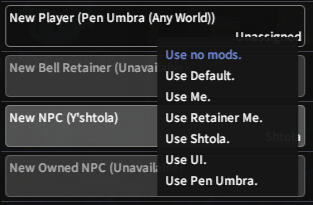
Then, look under Individual Assignments and either left click Current Character and assign the collection you made, or type the name of the player character you want to make a collection for, then left click New Player/Bell Retainer/NPC/Owned NPC and assign the specific collection. After you have entered the named of any characters/NPC's, you can also edit the collection used under Simple Assignments as well.
NOTE: You can have it for all servers, or a specific one. You can also make a selection between battle NPCs, event NPCs, companions, mounts, or accessories. Then, you can look through the list or search for the NPC or object you would like the collection for.

Step 3 - A
Set up your group
Go to the Collections Tab, hit the + and name your collection whatever makes sense for the group you are making the group collection for.


Step 3 - B
Set up your group
Then, look under Group Assignments, and left click on the Group you want to assign, and assign the specific collection to that group!
Step 4
Enable the mods for your new collection

Now go to the Mods tab. Go ahead and make sure to check the "Enable" checkbox is checked. Once you do, you can redraw and see if the mod is working for you.
Check Collection Details
If you want, you can click on Collection Details, and it will show all relevant information needed about the collection, including who it is assigned to, and any mods enabled and at what priority!
Step 6
And you're done!
Feel free to repeat the process if you need to make any additional assignments for other characters/NPCs/groups!
How to Install Penumbra
This guide is based on the fact that you already have XIV Launcher installed and Dalamud enabled. It also is based on you adding the repo at the beginning of this guide!You can see instructions on how to download and set up XIV Launcher/Dalamud here. Click below if you need the repo.
If you added the repo, at the start of the guide, you already have the repo set up for Penumbra and all other plugins in this guide. Let's walk through how to get Penumbra set up!Ready? Let's go!
DISCLAIMER:
PENUMBRA IS CURRENTLY IN TESTING. THIS GUIDE IS MADE TO ASSIST WITH SETTING UP PENUMBRA WHEN THE STABLE VERSION IS RELEASED. PLEASE WAIT UNTIL PENUMBRA IS RELEASED FULLY BEFORE FOLLOWING THIS GUIDE!
Now we need to install Penumbra. It doesn't install itself. Make sure you are in All Plugins.
IMPORTANT: At the base of one of of your hard drives/SSD, make a FFXIV Mods folder or look where Penumbra can make it for you. Please make sure the folder has plenty of room, and possibly is a faster drive like an SSD.
TIP: The root of the drive is the base of it, so in my example, I have mine at C:\FFXIV Mods.

DO NOT make it in your FFXIV install files.
**DO NOT ** make it in your Dalamud files.
DO NOT make your Downloads folder the root folder.
Ok, so....you know that folder I had you make or at least see where you wanted it to be made in the last section? Put the drive path for that folder you made into the Root Directory section in Penumbra Settings and hit Enter to SAVE IT. For example, my drive path is C:\FFXIV Mods.DO NOT PUT ANYTHING IN THIS FOLDER. THIS FOLDER IS ONLY FOR PENUMBRA TO CHANGE.

So what are mods?
Before we get too much more into this, lets go over some information about what plugins and mods are. Plugins are things you download from Dalamud Plugins like Penumbra, Glamourer, or Mare Synchronos. Mods are what you load INTO Penumbra to change things in game to customize you, your mounts, or basically anything in game.
Now, we have a few different packs you can load into Penumbra. They may be in the following extensions:.ttmp ~ .ttmp2 ~ .pmpIf you have mods in these formats, leave them like that. If you are seeing ttmpd.mpd and ttmpl.mpl, you went too far. GO BACK! You will need the mod in one of the colored formats to import it in the next step.
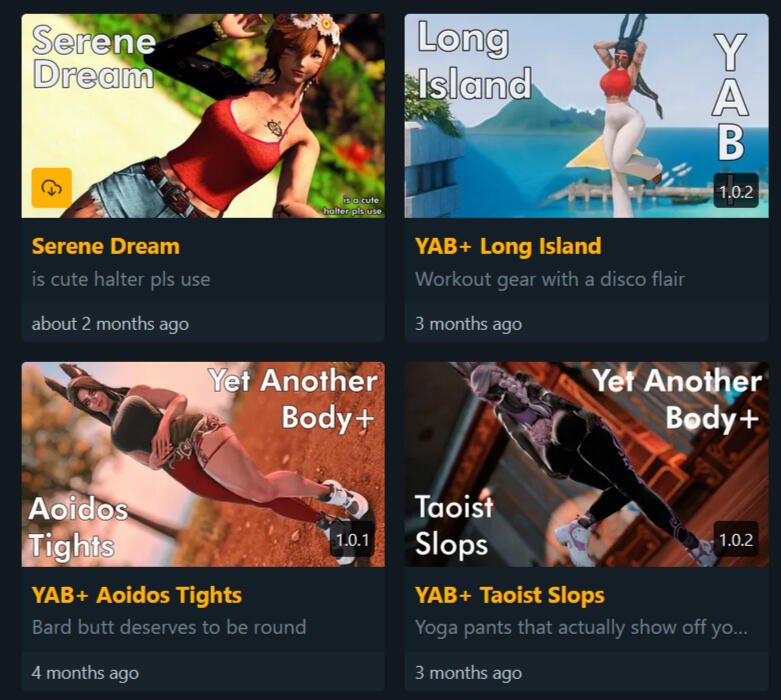
You can get mods at the websites listed to the right. I have provided an image of what Heliosphere looks like to the right. I personally recommend this site because it also has a plugin that will load your mods straight into Penumbra and update them for you. But all the sites are great! If you download a zip or rar file from one of these websites, extract it. The mod files will generally be inside.
Click on the mod import button as shown, find where you saved the mod using the built-in file explorer and double click or hit OK, and the mod will then be imported.
You can also drag and drop it into your mod tab as well!

Redraw if needed to enable the mods you enabled in the last step.
How to Install Penumbra
This guide is based on the fact that you already have XIV Launcher installed and Dalamud enabled. It also is based on you adding the repo at the beginning of this guide!You can see instructions on how to download and set up XIV Launcher/Dalamud here. Click below if you need the repo.
If you added the repo, at the start of the guide, you already have the repo set up for Penumbra and all other plugins in this guide. Let's walk through how to get Penumbra set up!Ready? Let's go!
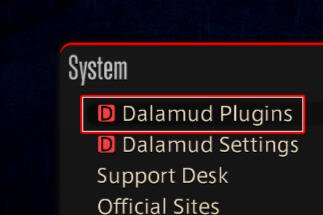
Go to Dalamud Plugins.
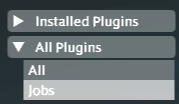
Now we need to install Penumbra. It doesn't install itself. Make sure you are in All Plugins.
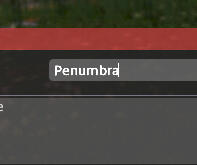
Search for Penumbra.
Install Penumbra.

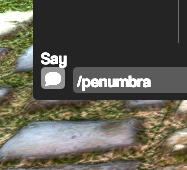
Type /penumbra to bring up the window.
IMPORTANT: At the base of one of of your hard drives/SSD, make a FFXIV Mods folder or look where Penumbra can make it for you. Please make sure the folder has plenty of room, and possibly is a faster drive like an SSD.
TIP: The root of the drive is the base of it, so in my example, I have mine at C:\FFXIV Mods.

DO NOT make it in your FFXIV install files.
**DO NOT ** make it in your Dalamud files.
DO NOT make your Downloads folder the root folder.
Ok, so....you know that folder I had you make or at least see where you wanted it to be made in the last section? Put the drive path for that folder you made into the Root Directory section in Penumbra Settings and hit Enter to SAVE IT. For example, my drive path is C:\FFXIV Mods.DO NOT PUT ANYTHING IN THIS FOLDER. THIS FOLDER IS ONLY FOR PENUMBRA TO CHANGE.

So what are mods?
Before we get too much more into this, lets go over some information about what plugins and mods are. Plugins are things you download from Dalamud Plugins like Penumbra, Glamourer, or Mare Synchronos. Mods are what you load INTO Penumbra to change things in game to customize you, your mounts, or basically anything in game.
Now, we have a few different packs you can load into Penumbra. They may be in the following extensions:.ttmp ~ .ttmp2 ~ .pmpIf you have mods in these formats, leave them like that. If you are seeing ttmpd.mpd and ttmpl.mpl, you went too far. GO BACK! You will need the mod in one of the colored formats to import it in the next step.
You can get mods at the websites listed to the right. I have provided an image of what Heliosphere looks like to the right. I personally recommend this site because it also has a plugin that will load your mods straight into Penumbra and update them for you. But all the sites are great! If you download a zip or rar file from one of these websites, extract it. The mod files will generally be inside.
Go to Mods.

Click on the mod import button as shown, find where you saved the mod using the built-in file explorer and double click or hit OK, and the mod will then be imported. You can also drag and drop mod files from your PC into the left part of the window to import as well.

Go to the selected mod, click Enable, and set any configuration.

Redraw if needed to enable the mods you enabled in the last step.
So you want to scale your body?
Whether you want to scale your body height or weight, you can do so! But, the directions on how to do so differ based on what you want to scale!. So, now that you want to look into scaling, what do you want to scale?
So you want to be tall or smol?
Whether you want to make yourself taller or smol, you can do so! Let's get started on how to scale the height of your character!
Height - Step 1
Make a new mod and name it something you will remember. I named my Racial Scaling.

Height - Step 2
Go into Advanced Editing > Meta Manipulations, and find Racial Scaling Edits (RSP). Drop that down, and then from the drop down, select the race/clan you want to make the edit on, and the thing you want to scale. Hit the + after to make a new entry under that.

Height - Step 3
Click on the numbers to the right of the clan, and move them up or down depending on if you want to be taller or smaller! Green means it is taller than where it started and red means it is smaller!

Height - Step 1
Make a new mod and name it something you will remember. I named my Racial Scaling.

Height - Step 2
Go into Advanced Editing > Meta Manipulations, and find Racial Scaling Edits (RSP). Drop that down, and then from the drop down, select the race/clan you want to make the edit on, and the thing you want to scale. Hit the + after to make a new entry under that.

Height - Step 3
Click on the numbers to the right of the clan, and move them up or down depending on if you want to be taller or smaller! Green means it is taller than where it started and red means it is smaller!

So you want to be thicc or thin?
Whether you want to make yourself thiccer or thinner, you can do so! Let's get started on how to scale the weight of your character!You also NEED to have Customize+ in order to follow these steps.
Installing Customize+
If you already have the Sea of Stars repo advised to add at the beginning of this guide, all you need to do is search for Customize+ under All Plugins in Dalamud Plugins and Install!If you don't have Sea of Stars set up, either go to the beginning of this guide and set it up, or if you don't want to add it, make sure to add this repository to be able to download C+.
https://raw.githubusercontent.com/Aether-Tools/DalamudPlugins/main/repo.json
Once you have it installed, follow the guide with one of these two options.
Weight - Step 1
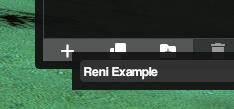
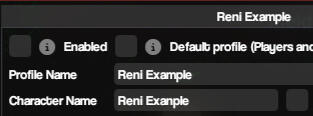
Go into Customize+ (C+) and go to the Profiles tab. Hit the + and name it, then where it asks for Character name, and type in your exact character name! That will set up your character profile! Now lets work on your scale!
Weight - Step 2
Now, click on the Templates tab, hit the + and name your scale. Click "Start bone editing" and then look through the different options available. In order for it to show on your character, make sure to put your character name in where it says:
"Show editor preview on character name"
There are a lot of things to edit in this window, but play around with it and fine tune parts till you are satisfied with the result.
Common areas to scale are:
Waist
Spine A/B/C
Breast (Left/Right)
Arms (Any/All Options)
Legs (Any/All Options)
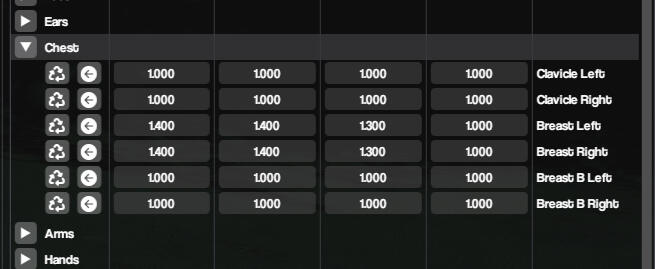
I WOULD ADVISE TO STAY AWAY FROM ANYTHING TO DO WITH THE HEAD. Additionally, aside from breasts and a few exceptions, you want to stick to only changing two of the three dimensions. Most of my scaling only uses Y and Z for example, aside from the breasts.Also, just because you have changed the scale of an IVCS bone, it does not mean it will apply if you are not naked with an IVCS body.
There are a lot that goes into scaling your body, and if you have additional questions, please find the Customize+ section of the XIV Tools Discord for more assistance. They have a ton of incredibly helpful people ready to help you, including the devs of C+ themselves.
Weight - Step 3
Once you are happy with all your body proportions, hit "Finish bone editing". Go to the Profile tab, enable your character profile, set the scale you want to use under it, and you should be good to go!

Weight - Step 1
Go into Customize+ (C+) and go to the Profiles tab. Hit the + and name it, then where it asks for Character name, and type in your exact character name! That will set up your character profile! Now lets work on your scale!
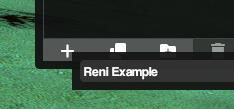
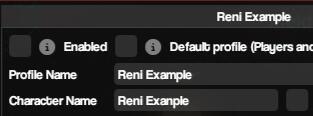
Weight - Step 2
Now, click on the Templates tab, hit the + and name your scale. Click "Start bone editing" and then look through the different options available. In order for it to show on your character, make sure to put your character name in where it says:
"Show editor preview on character name"
There are a lot of things to edit in this window, but play around with it and fine tune parts till you are satisfied with the result.
Common areas to scale are:
Waist
Spine A/B/C
Breast (Left/Right)
Arms (Any/All Options)
Legs (Any/All Options)
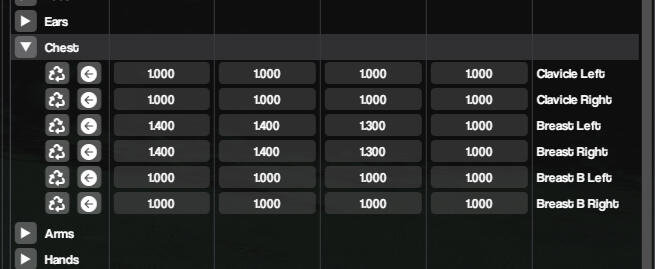
I WOULD ADVISE TO STAY AWAY FROM ANYTHING TO DO WITH THE HEAD. Additionally, aside from breasts and a few exceptions, you want to stick to only changing two of the three dimensions. Most of my scaling only uses Y and Z for example, aside from the breasts.Also, just because you have changed the scale of an IVCS bone, it does not mean it will apply if you are not naked with an IVCS body.
There are a lot that goes into scaling your body, and if you have additional questions, please find the Customize+ section of the XIV Tools Discord for more assistance. They have a ton of incredibly helpful people ready to help you, including the devs of C+ themselves.
Weight - Step 3
Once you are happy with all your body proportions, hit "Finish bone editing". Go to the Profile tab, enable your character profile, set the scale you want to use under it, and you should be good to go!

Want to convert an item?
Well, as of 6.2 and the newest release of Penumbra, you can! Follow along as Aleks shows us how to do so!
Make sure to also check out Nova's addition on Page 7 of the this walkthrough to find out how to swap accessory slots like earrings to rings!
Glamourer? What is that?
Glamourer is a plugin by Otter, the dev of Penumbra, that can work together with Penumbra. It allows you to right click items in Penumbra to see them on you, and then make Designs from them. If you just don't have the item, you can use it to still glam into the item the mod is on instead of converting it. If it's not just that you don't own the item or you have multiple mods using the same item, you can do an Item Swap!
Glamourer Demo
How do I swap items?
On the mod you want to swap items on, go into Advanced Settings, then Item Swap. For gear, you would choose what item you want to take the look from, and what item you want to put it on. For hair/ears/tail, you would choose the number of tail/ears/hair you want to take it from, and also what you would like to put it on. You also choose what gender and race as well.
After you have chose the options for that type of swap you would like, you can either create a whole new mod, or set it to be an option on the current mod. Name the mod or option you would like, then click on Create New Mod to create a new mod, or Create New Option to make an option for the current mod.


So how do I get Glamourer?
This section of the guide assumes you have already set up the repo as instructed at the beginning of the guide. If you haven't, click below!
DISCLAIMER:
GLAMOURER IS CURRENTLY IN TESTING. THIS GUIDE IS MADE TO ASSIST WITH SETTING UP GLAMOURER WHEN THE STABLE VERSION IS RELEASED. PLEASE WAIT UNTIL PENUMBRA IS RELEASED FULLY BEFORE FOLLOWING THIS GUIDE!
Install it! From here, you can make any designs you want! Set them up as Automations if you want to change looks between classes! Let's go over how to do that!
How do I set up Designs?
There are different ways you can do this, but I will show you two ways to do it!

One way is to import a mod, go to the Changed Items tab, right click an item and it will apply the modded look on your character (if it is enabled). You can then go to the Actors tab, and click the disk icon as shown in the next column.

The other way is to bring Glamourer up, go to Actors, and change each section as wanted. Once completed, hit the disk button as shown above.
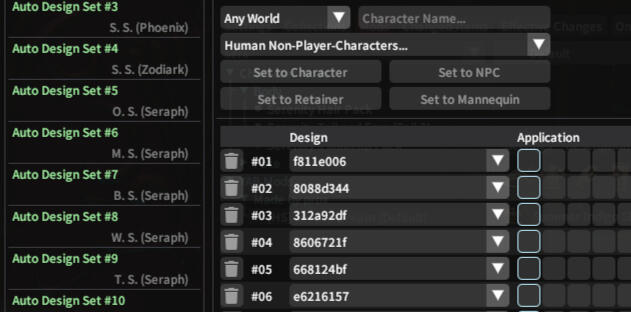
While designs are now applied through zones and changes, you can now set up Automations to change your gear when changing jobs or roles if you want. I will provide a link below on how I like to set my automations up!
How I use Automations
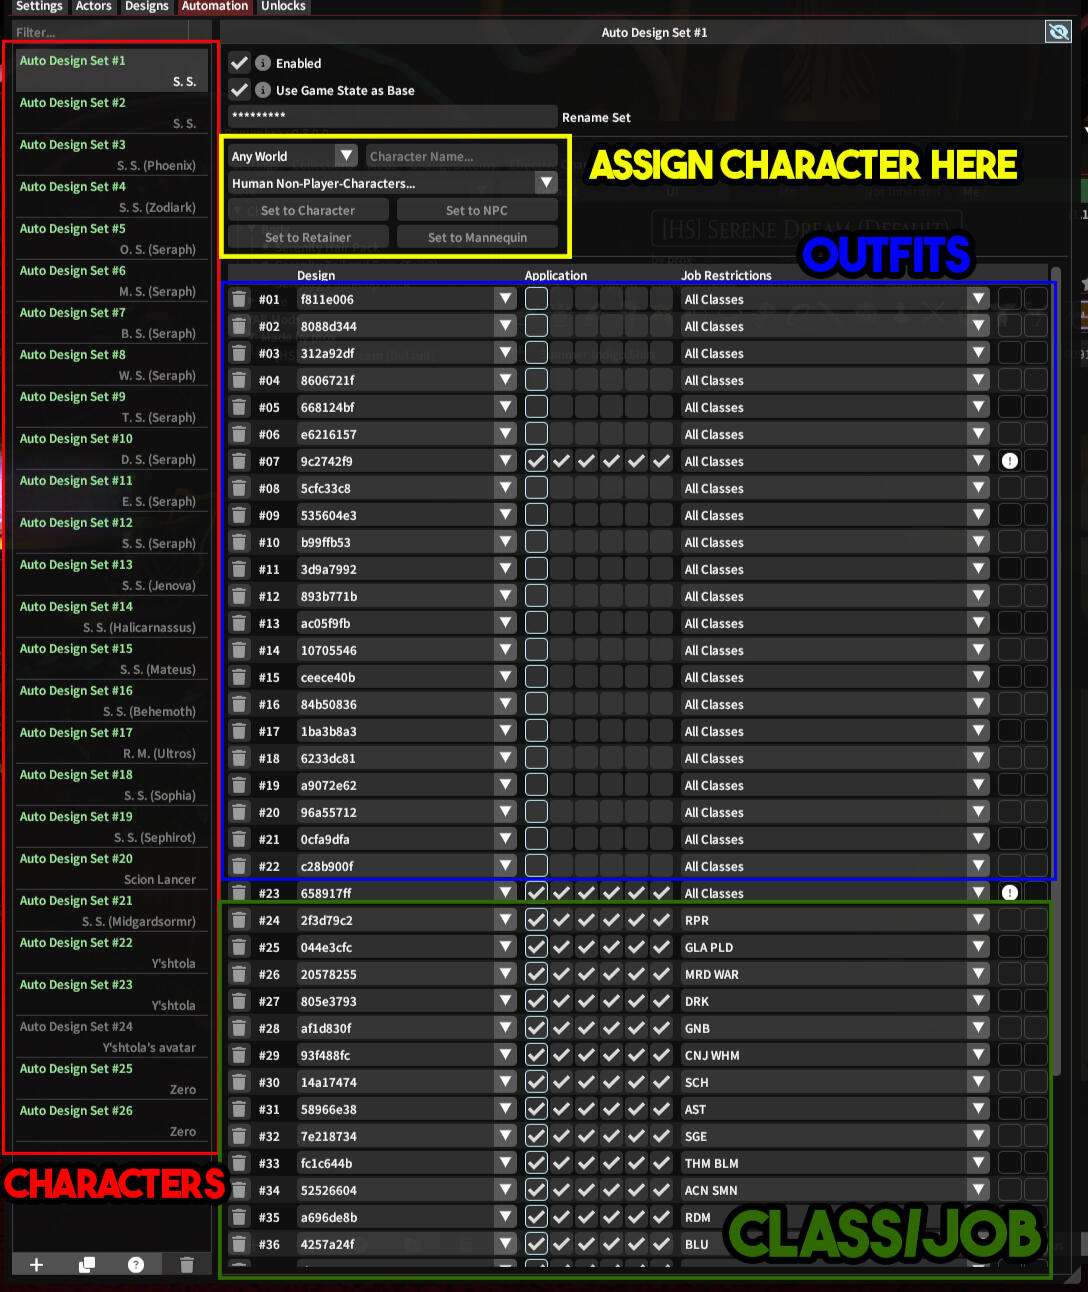
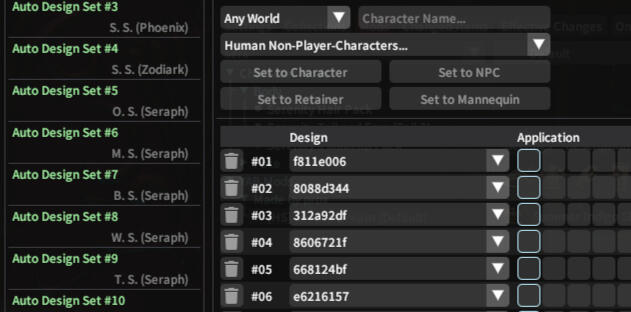
Changed from how Fixed Designs work, the Automations page works based on whatever is highest in the list. So, you can put things lower if you want them overridden by higher things. Or, only have one thing enabled if you want to use a specific look.As you can see by my color coded friend next to me, I have the automations tab separated into what character it applies to on the left and then the outfits I want to use first only applying the gear, and then all the classes below them with a color specific to that class.Outfits only apply gear, and jobs/classes only apply dyes.
Check the video to see what I mean!
So how do I get Glamourer?
This section of the guide assumes you have already set up the repo as instructed at the beginning of the guide. If you haven't, click below! Also, Glamourer depends on Penumbra so make sure you install that first!
Go to Dalamud Plugins and search for Glamourer.
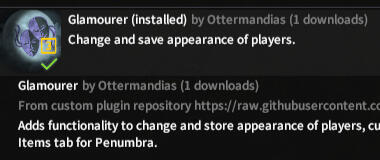
Install it! From here, you can make any designs you want! Set them up as Automations if you want to change looks between classes! Let's go over how to do that!
How do I set up Designs?
There are different ways you can do this, but I will show you two ways to do it!

One way is to import a mod, go to the Changed Items tab, right click an item and it will apply the modded look on your character (if it is enabled). You can then go to the Actors tab, and click the disk icon as shown in the next column.

The other way is to bring Glamourer up, go to Actors, and change each section as wanted. Once completed, hit the disk button as shown above.
While designs are now applied through zones and changes, you can now set up Automations to change your gear when changing jobs or roles if you want. I will provide a link below on how I like to set my automations up!
Let's talk about...
Advanced Customizations
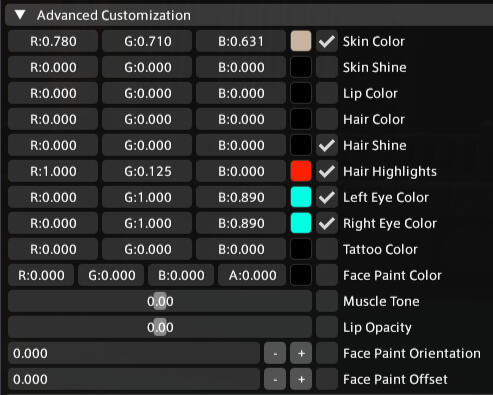
Glamourer at its core lets you choose options based on the strict choices provided in character customization. However, some people want to be able to add more customizations. With Advanced Customizations, you can choose certain options on a more open selection and cherry pick exactly what you want to look like! Similar in scope to the plugin Palatte+, you can change values outside the normal range that FFXIV allows. As this is part of Glamourer, you can also set it up to change based on job or gearset changes as well!
Just find the section in your design, or select the actor you want to change, find the Advanced Customizations section, and change the values for each as you like!NOTE: If the section does not appear, make sure you have it enabled in the Glamour Behavior section of Settings.
Can I just copy my palette to Glamourer?
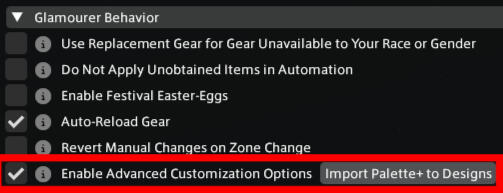
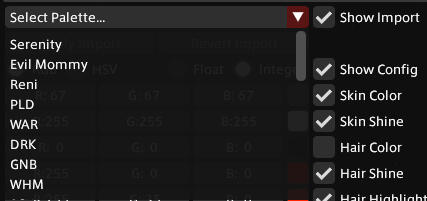
Now that Glamourer can use Advanced Customizations and Mare is removing Palette+ syncing, it is recommended to move your palettes to Glamourer! Thankfully, it is pretty easy to do so! Just create a new design or go to the design you want to import it to, go to the Advanced Customization section, select the palette you want from the dropdown, and then hit Apply Import. It will pull your settings from Palette+ into the Advanced Customizations section! You can also import ALL of your palettes into separate designs by hitting the "Import Palette+ to Designs" button either next to the "Show Palette" Import Button" setting under Interface, or the "Enable Advanced Customization Options" setting under Glamour Behavior.
NOTE: If the section does not appear, make sure you have it enabled in the Glamour Behavior section of Settings. To import, you also need to enable "Show Palette+ Import Button" under Interface in Settings as well.


How can I make Glamourer work like Palette+?
You may be asking "How can I use Glamourer like Palette+? Do I need to put my advanced customization in every design?" The answer is NO. Glamourer and Palette+ work in the same way. Glamourer just has more functionality! Let's go over some basics, and then I will go step by step how you can make it work for all your designs! So, without further ado, let's dig in!
Let's go over how things are the same. Some basic terms and how the compare:
| Glamourer | Palette+ |
|---|---|
| Actors Tab | Edit Players |
| Design Tab | Saved Palettes |
| Automation | Persistence |
Step 1 - Edit your customizations
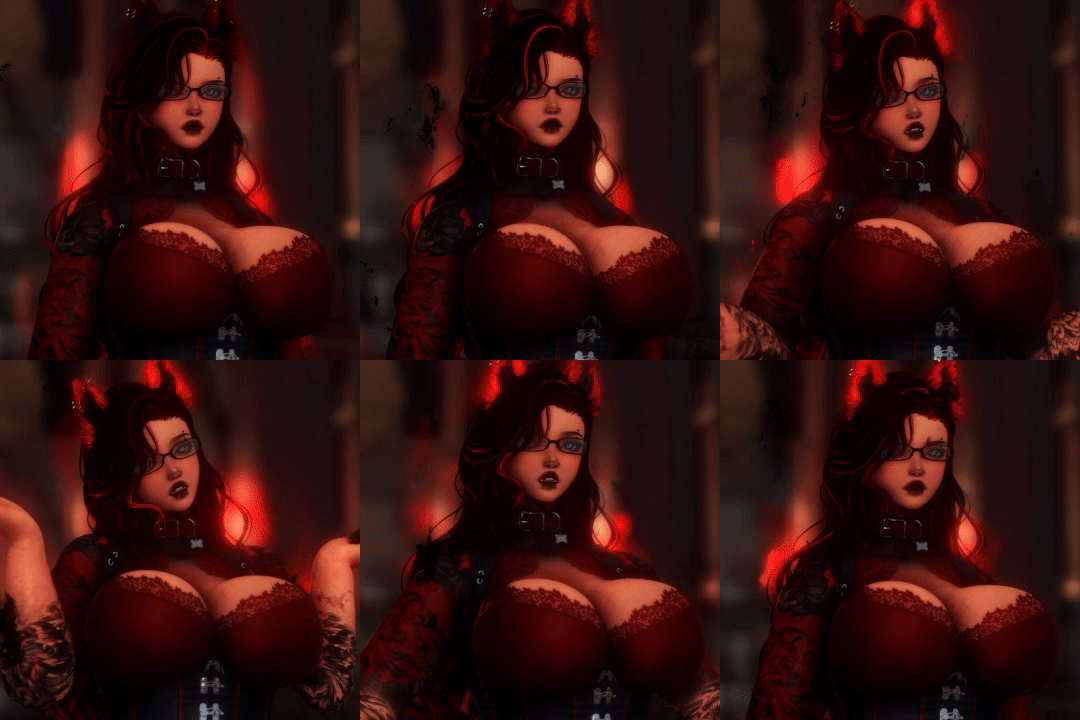
Ok so...first, this is going over if you need to actually make the design first. If you imported your Palette+ designs, we will see you in Step 2. So, go to the Actors tab, drop the Advanced Customization section down, and change the values until you have the look that you like! Save it and name it what you want.

Step 2 - Make it only apply customizations
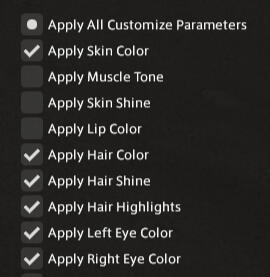
Now, go into the Designs tab, find your design and drop the Application Rules section down. Uncheck EVERYTHING in there except whatever is checked for "Customize Parameters". That is your customization!

Step 3 - Set up automation
Now, go into the Automations tab, go to the bottom of the list, and choose the design you were editing in previous steps. It should automatically be set to All Classes, but this can also be set to a specific classes or roles like I do. Click and hold on the number and drag it all the way to the top if you want it on all the time, or to whatever place you would like it to be in priority.

Glamourer automations are based from the top down, so whatever is first will be applied first, and then work down from there to apply anything else that wasn't applied in previous applicable designs. Putting it at the top will mean that all other designs below it will not apply as it is the top one. And now, Glamourer will work just like Palette+!
Why is my mod in a different color?
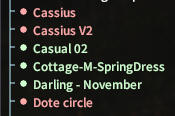
If your mods show in red, it is because you have two mods that are using the same resource, and at the same priority level. You need to change the priorities to put one above the other.
If it is in green, it means that two mods are using the same resource, but at different priority levels. The conflict is solved! Need to know more about priorities? Click below!
Material Assignment?
Material Assignment is when you need to change the material suffix from one layer to another.
Let's go over some basics for material layers. Each body mod (bibo, TF Gen3) uses it's own layer, and sometimes you need to change it so your skin doesn't look misaligned. But what are the default layer assignments?
Quick Breakdown
Is it Bibo & working? - it's on "bibo"
Is it TF3 & working - it's on "b"
Is it Bibo & not working - it's on "b".
Convert to "bibo".
Is it TF3 & not working -it's on "d".
Convert to "b".
Material Layer Designations
Females
a - Vanilla/Gen2-based bodies
b - Gen3-based bodies / formerly Bibo+ (obsolete, found on legacy Bibo+ mods)
bibo - Bibo+ based bodies
bibopube - Bibo+ pubes material
c - Gen3 pubes material
d - formerly Bibo+ compatibility, specific to TFGen3 (obsolete, found on legacy Bibo+ mods & TFGen3 mods)Males
a - Vanilla/The Body 1.5/HRBody 1.5 based bodies
b - TBSE material / HRBody Roegadyn material
ftmse - TBSE FTM (Fabulous Trans Men) material
c - formerly The Body 2.0 and HRBody 2.0 Roegadyn bodyhair material, found on legacy TB2/HR2 mods
h - formerly HRBody 2.0 Hrothgar bodyhair material, found on legacy HR2 modsLalafells
a - Vanilla base body
g - Otopop-based bodies
Ok, but how do I do that?
To reassign materials for a mod, you would go to the Mod tab, then go to the mod that needs material reassigned and click on the Advanced Settings tab.
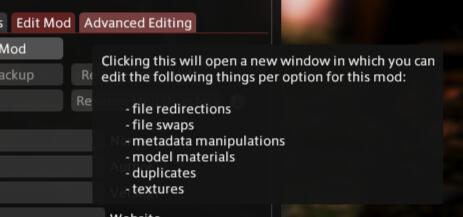
Then, go to to the Material Reassignment section, and change From... to the material that it needs to be changed from, and To... to the material it needs to be changed to. Make sure to hit Change Material Suffix once you are done.

Ok, so what is this...inheritance?
How does that help me?
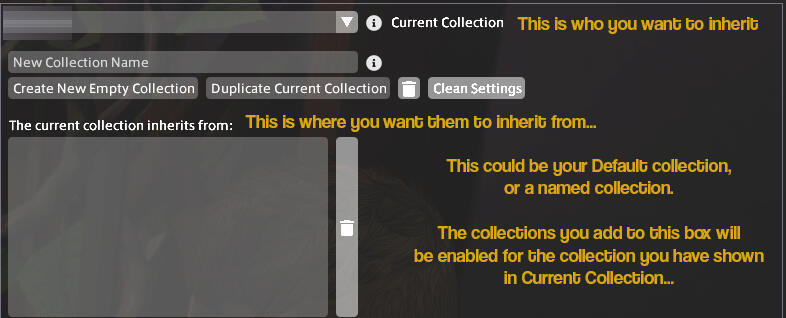
With Penumbra, you can set it so other characters "inherit" the settings of a different character. Take me for example. I have my main character, and seven alts. I know...why have so many characters? But I digress...
So like, in my case, I would set one of my alts to inherit from my Serenity collection. My alt's collection would show in Current Collection, and my Serenity collection would be listed in the big box, showing it is inheriting from my already set up collection.
Inheritance Status
Original Collection
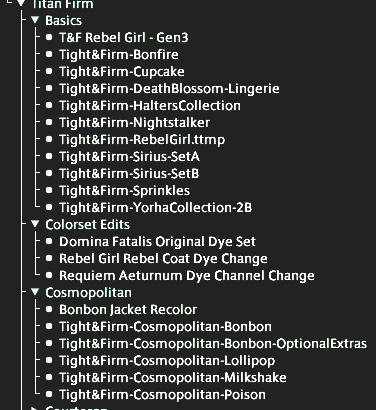
This is how it will look for the collection you want other characters to use. These have all been activated and set up for this character. This needs to be done first to be able to inherit from it.
Inherited Collection
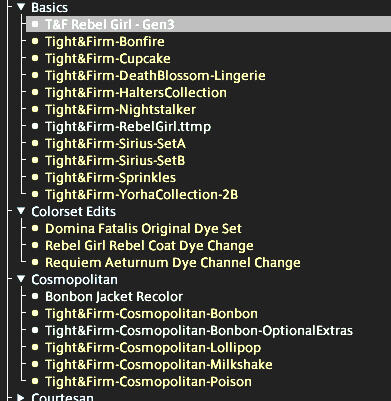
This is how it looks for the character inheriting the collection. No set up was done for this character as it was already done on the original collection. All you need to do is tweak things for this character.
Setting up Inheritence
So how do you use this...inheritence? Make sure you are on the Collections page, and scroll down to the Inheritence section at the bottom.
How Priority Works
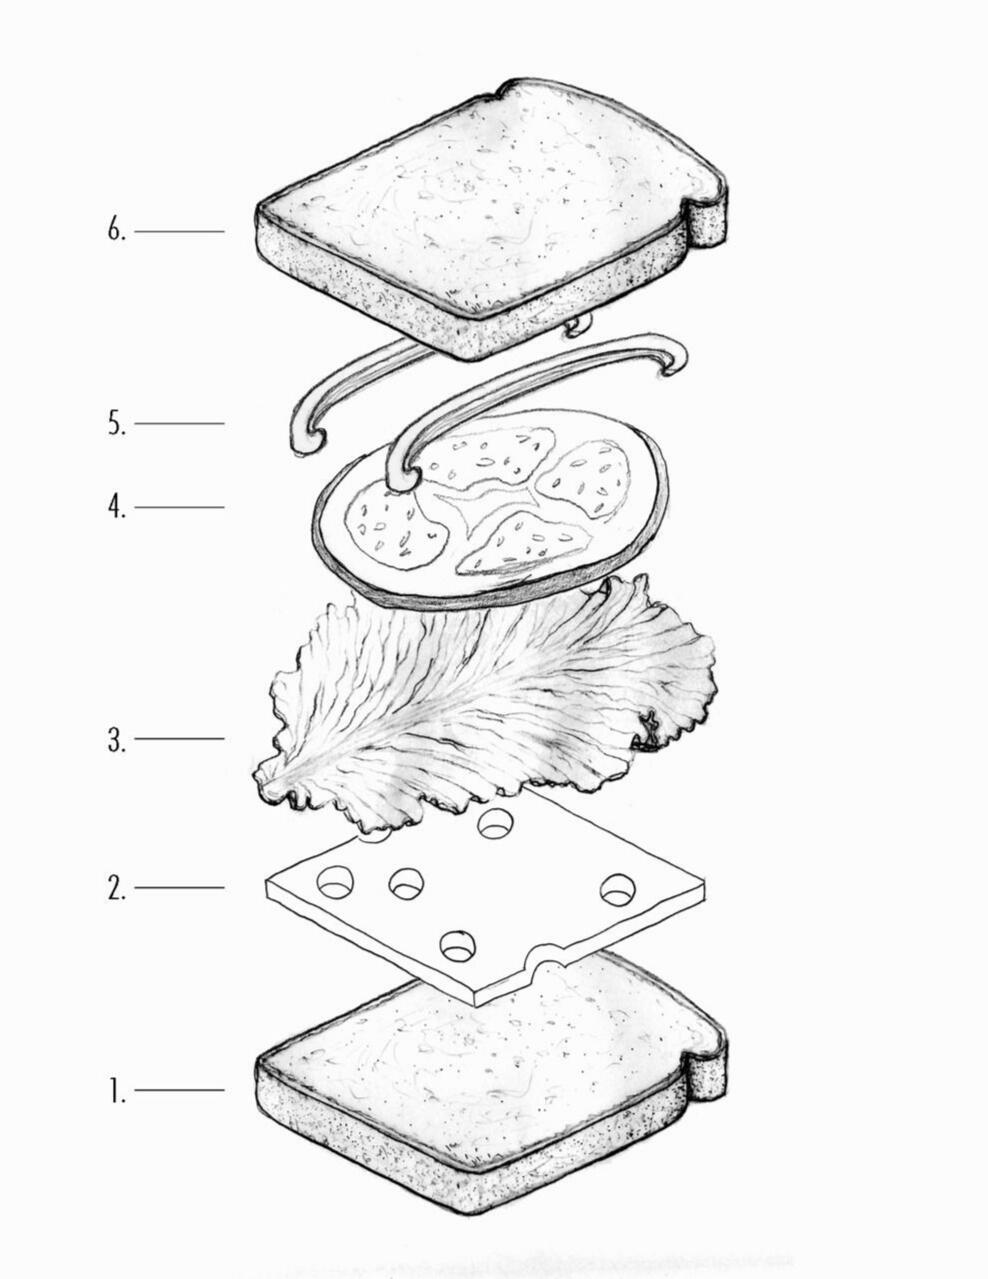
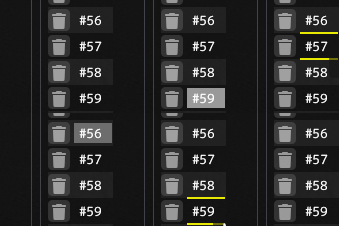
If you have mods that are conflicting, you may need to set priority. A good example of this is when trying to set up a tattoo on your character. Priority in Penumbra works like a sandwich. You set priority based on how you want to load things.
So say you want to put a tattoo on yourself. Most mods start at Priority 0, and then you can change it from there. So, you could leave the body mod at 0, and then change the tattoo mod to priority 1. That would mean that the body mod would be loaded first, and then the tattoo mod would be "layered" on after it.Make sense?
However, there is no "starting point" for what is the base. Whatever is set to a higher number will be loaded later. Like in the image to the left, you start with the piece of bread, then the meat (or no meat if you like), cheese, lettuce, tomato, etc...And this also includes negative numbers as well. So, just because a mod may start at 0 doesn't mean that is the lowest priority. A mod set to -1 is a lower priority than a mod at 0.
Adding Loose Files to Penumbra
Do you have a tattoo, makeup or eye mod, but they only gave you a .dds or .png file? You have one of two options. With recent advancements in technology (thanks Otter!), you can now add them to Penumbra, and make them a mod.But how do you do that?
Go to the mod, and click on the Edit Mod tab for the empty mod, and click "Open Mod Directory".

Save it to the chara folder we made in the previous step. Make sure to click into the folder before saving as it defaults to the base of the mod folder.

Assign the texture path of the item in game you want to replace, and then hit Apply Changes.

And now you have your loose file set to a mod in Penumbra! Make sure to change the priority if you made a tattoo mod, as your tattoo needs to be higher than your body mod.
Adding Loose Files to Penumbra
Do you have a tattoo, makeup or eye mod, but they only gave you a .dds or .png file? You have one of two options. With recent advancements in technology (thanks Otter!), you can now add them to Penumbra, and make them a mod.But how do you do that?
First, you want to create an empty mod.

Go to the mod, and click on the Edit Mod tab for the empty mod, and click "Open Mod Directory".

In the mod directory, make a folder and name it "chara" as shown below.

Next, you will want to go to Advanced Editing, and then Textures.

Click the folder, and find your file.

Once you choose your file, click "Save as TEX".
Save it to the chara folder we made in the previous step. Make sure to click into the folder before saving as it defaults to the base of the mod folder.

Click on File Redirections.

Hit the Reload button for your newly imported files to appear.

Your imported file TEX file should show in this tab.

Assign the texture path of the item in game you want to replace, and then hit Apply Changes.

And now you have your loose file set to a mod in Penumbra! Make sure to change the priority if you made a tattoo mod, as your tattoo needs to be higher than your body mod.
What is Lightless?
Lightless, similar to Mare, allows you to sync mods in Penumbra, and Glamourer designs with other people seemlessly without needing to download or configure their mods or designs. It does this by "pairing" with another player like you would pair a device with another one, like with Bluetooth.This makes it so that as soon as you go through the setup, and as soon as you both pair with each other, you will see each other as you are meant to be seen. But, don't get worried, it only works between people you have paired with, so not everyone will see your mods.
I shouldn't even have to mention this, but it also requires Penumbra and Glamourer to function, so Textools users check out how to install Penumbra and Glamourer in this very guide, move all mods over to Penumbra, repair your install with XIV Launcher (explained on the next page) and completely stop using Textools.
Installing Lightless
Similar to how you install Penumbra and Glamourer, Lightless uses a repo to download it from Dalamud Plugins. Just copy the link below, and add it to the Experimental section of Dalamud Settings.
https://repo.lightless-sync.org/
If you need help on how to add a repo, click here for more information. Sea Of Stars is good to add for most plugins, but Lightless is not a part of the Sea of Stars repo.
WAIT A MINUTE...
Two things....First, this will not work at ALL if you still use Textools for anything. So, if you are fresh off the boat from Textools to Penumbra and Glamourer, run a repair through XIV Launcher first. You do so by right clicking the Log In button on XIV Launcher. You will also need to reinstall any third party things like ReShade after repairing.
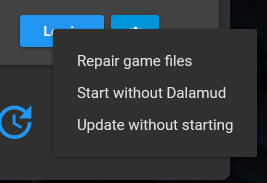
Also, unlike Penumbra or Glamourer, Lightless, just like Mare, REQUIRES Penumbra and Glamourer to be installed. You need to make sure you have both to move on, and in Penumbra's case, you need to make sure to complete all the setup as well. If you haven't downloaded one of them, choose the option you don't have, and I will help you get it set up. If you have both, you may continue...
Get these first!
Before we get started, it is helpful to get two things ready! Lightless, similar to Mare, needs you to verify some information before it allows you to register.First, it would be helpful to hop into the Lightless Discord, so you are ready when we get to specific steps in the guide. It will require you to enter specific information to do the process, so go ahead and join!Also, one of the steps will require you to enter your character on the Lodestone. So, make sure to have that up as well.
Lodestone Page Tips
To make sure you can set Lightless up successfully, ensure you have the right page. It should look like this:
https://na.finalfantasyxiv.com/lodestone/character/xxxxxxxx/
OR
https://na.finalfantasyxiv.com/lodestone/character/xxxxxxxx/
NOT
https://na.finalfantasyxiv.com/lodestone/my/
The x's would be your specific character's code so for privacy reasons, they won't be shared in the guide.
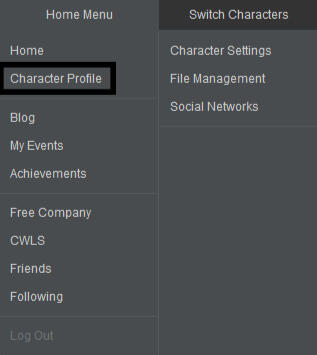
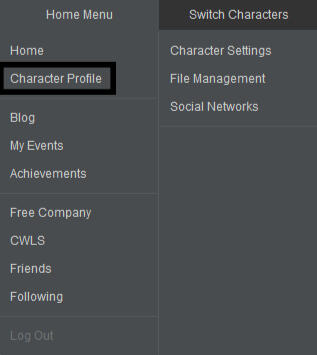
You can find it by dropping this menu as shown above and clicking Character Profile. With this page ready, we can move on to the next step!
Create Lightless Account
Go to the Lightless Discord, and navigate to the #lightless-service channel. Click the Start button to begin!
The bot will present options specific to your account and what you can do. If you have never signed up, it should give you an option to register for the service by clicking "Register". That will provide instructions on getting your Lodestone URL like we did in a previous step.
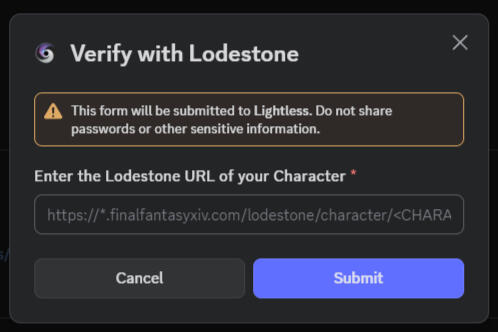
Click "Start Registration" under the embed. A pop-up will appear for you. It will ask you to submit the URL I referenced in the previous step. Copy the webpage and put it in this box as shown above, then hit Submit.
You should receive a personal embed like what is shown in the top right. Where the blurred section is, you will see a code. Copy this string, and put it in your Lodestone Profile.
You add it by going to the section on your profile shown to the right, and clicking on the pencil. Paste your code in and Confirm till you get the bottom right image.
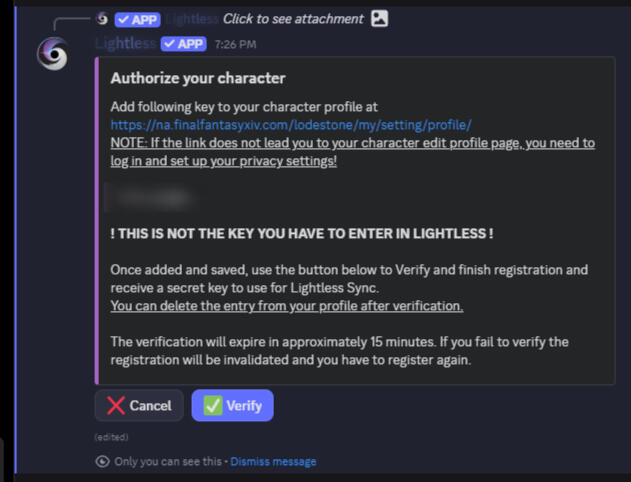


Go back to the #lightless-service channel after your code has been added to your Lodestone profile. This time, click the "Verify" button and the server will process the verification. Hit "Check" to see if the verification is complete. After it has processed, it will update the embed with your secret key.
KEEP THIS SAFE AND DO NOT SHARE IT!
Because Lightless authenticates through Discord, we don't need to enter this code, but it is still required to do this to tie your Mare and Discord accounts together, and the secret key can be used in advanced setups.
YOU CAN NOW SAFELY REMOVE THE STRING FROM YOUR LODESTONE PROFILE
With that out of the way...
Now that you have your secret key, it is time to log into a character. I know some plugins work on the title screen, but with Lightless, it is needed for you to be on a character.

As you have already set up Penumbra and Glamourer, you can go into Dalamud Plugins, make sure you are in All Plugins, and search for Lightless Sync. Hit Install.
Lightless will only show if you have already added the repo. If you need to add the repo for Lightless, click below to add the repo.

The first page of the setup should automatically show up. Just a reminder but you should already have both Penumbra and Glamourer installed prior to this step. Make sure it says Available for both Penumbra and Glamourer.
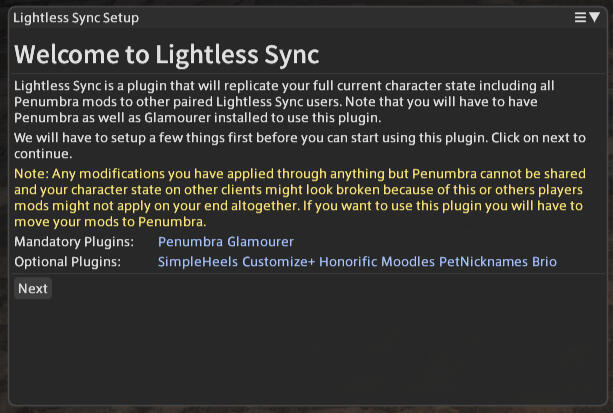
That will take you to the Agreement for Lightless. READ IT!After 60 seconds, you will then be able to click on continue and move forward.

Now, we will set up your file storage folder. Similar to what I told you for the root folder in Penumbra, make a new folder in the base of a drive, preferably at the base of the drive you make the folder for Penumbra. BUT, don't put it IN your Penumbra folder. Click the folder as shown in the pic to the right, and navigate to the folder you made. Make sure to follow the warnings and notes on the page when setting up your folder.
Hit Start Scan and let it scan your files. It will move on to the next step once the scan is done.
Since we have already set up your account, click "Check if Server supports Discord OAuth2" and wait for it to check. It should come back saying "Server is compatible with Discord OAuth2" so click on "Authenticate with Server" and look for a pop-up window in your browser. Log into Discord, and it will authenticate you! Close the window when it tells you that you can, and then go back to in game. Click on "Update UIDs from Service", then click the UID drop down and select the UID you want to use on the character you are logged in on. Then, just hit "Connect to Service" and you are connected!
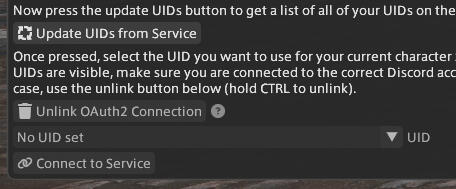
In the first available field on the main window, put your friends UID in and hit the + to add them.

If done correctly, they should be added. Happy syncing!
And that's it! Lightless is set up, and you will sync with your friend. Any changes in Penumbra or Glamourer they make will also be shown to you, once it has been downloaded. Repeat with the rest of your friends!
What is Lightless?
Lightless, similar to Mare, allows you to sync mods in Penumbra, and Glamourer designs with other people seemlessly without needing to download or configure their mods or designs. It does this by "pairing" with another player like you would pair a device with another one, like with Bluetooth.This makes it so that as soon as you go through the setup, and as soon as you both pair with each other, you will see each other as you are meant to be seen. But, don't get worried, it only works between people you have paired with, so not everyone will see your mods.
I shouldn't even have to mention this, but it also requires Penumbra and Glamourer to function, so Textools users check out how to install Penumbra and Glamourer in this very guide, move all mods over to Penumbra, repair your install with XIV Launcher (explained on the next page) and completely stop using Textools.
Installing Lightless
Similar to how you install Penumbra and Glamourer, Lightless uses a repo to download it from Dalamud Plugins. Just copy the link below, and add it to the Experimental section of Dalamud Settings.
https://repo.lightless-sync.org/
If you need help on how to add a repo, click here for more information. Sea Of Stars is good to add for most plugins, but Lightless is not a part of the Sea of Stars repo.
WAIT A MINUTE...
Two things....First, this will not work at ALL if you still use Textools for anything. So, if you are fresh off the boat from Textools to Penumbra and Glamourer, run a repair through XIV Launcher first. You do so by right clicking the Log In button on XIV Launcher. You will also need to reinstall any third party things like ReShade after repairing.
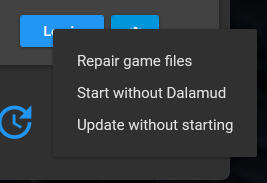
Also, unlike Penumbra or Glamourer, Lightless, just like Mare, REQUIRES Penumbra and Glamourer to be installed. You need to make sure you have both to move on, and in Penumbra's case, you need to make sure to complete all the setup as well. If you haven't downloaded one of them, choose the option you don't have, and I will help you get it set up. If you have both, you may continue...
Get these first!
Before we get started, it is helpful to get two things ready! Lightless, similar to Mare, needs you to verify some information before it allows you to register.First, it would be helpful to hop into the Lightless Discord, so you are ready when we get to specific steps in the guide. It will require you to enter specific information to do the process, so go ahead and join!Also, one of the steps will require you to enter your character on the Lodestone. So, make sure to have that up as well.
Lodestone Page Tips
To make sure you can set Mare up successfully, ensure you have the right page. It should look like this:
https://na.finalfantasyxiv.com/lodestone/character/xxxxxxxx/
OR
https://na.finalfantasyxiv.com/lodestone/character/xxxxxxxx/
NOT
https://na.finalfantasyxiv.com/lodestone/my/
The x's would be your specific character's code so for privacy reasons, they won't be shared in the guide.
You can find it by dropping this menu as shown above and clicking Character Profile. With this page ready, we can move on to the next step!
Create Lightless Account
Go to the Lightless Discord, and navigate to the #lightless-service channel. Click the Start button to begin!
The bot will present options specific to your account and what you can do. If you have never signed up, it should give you an option to register for the service by clicking "Register". That will provide instructions on getting your Lodestone URL like we did in a previous step.
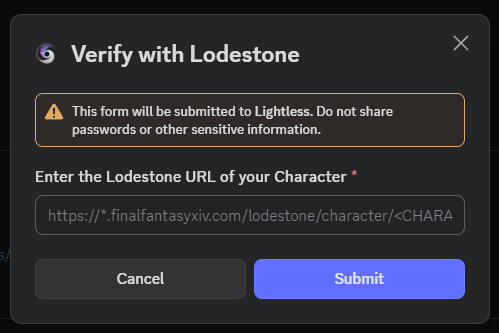
Click "Start Registration" under the embed. A pop-up will appear for you. It will ask you to submit the URL I referenced in the previous step. Copy the webpage and put it in this box as shown above, then hit Submit.
The embed from the previous step should update to show a long string of numbers. Where the blurred section is, you will see a code. Copy this string, and put it in your Lodestone Profile.
You add it by going to the section on your profile shown to the right, and clicking on the pencil. Paste your code in and Confirm till you get the bottom right image.
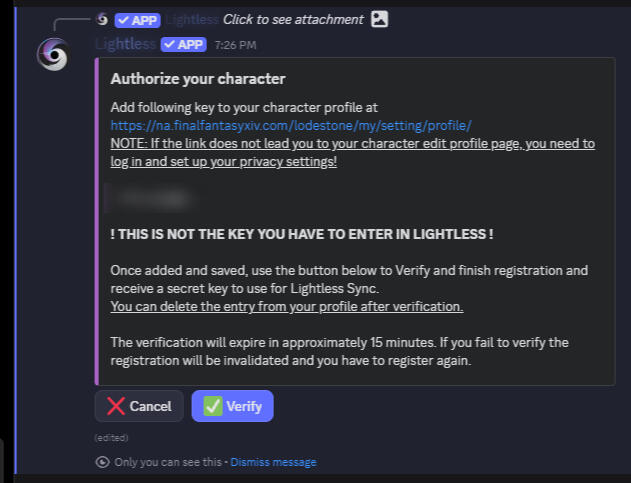


Go back to the #lightless-service channel after your code has been added to your Lodestone profile. This time, click the "Verify" button and the server will process the verification. Hit "Check" to see if the verification is complete. After it has processed, it will update the embed with your secret key.
KEEP THIS SAFE AND DO NOT SHARE IT!
Because Lightless authenticates through Discord, we don't need to enter this code, but it is still required to do this to tie your Mare and Discord accounts together, and the secret key can be used in advanced setups.
YOU CAN NOW SAFELY REMOVE THE STRING FROM YOUR LODESTONE PROFILE
With that out of the way...
Now that you have your secret key, it is time to log into a character. I know some plugins work on the title screen, but with Lightless, it is needed for you to be on a character.

As you have already set up Penumbra and Glamourer, you can go into Dalamud Plugins, make sure you are in All Plugins, and search for Lightless Sync. Hit Install.
Lightless will only show if you have already added the repo. If you need to add the repo for Lightless, click below to add the repo.

The first page of the setup should automatically show up. Just a reminder but you should already have both Penumbra and Glamourer installed prior to this step. Make sure it says Available for both Penumbra and Glamourer.
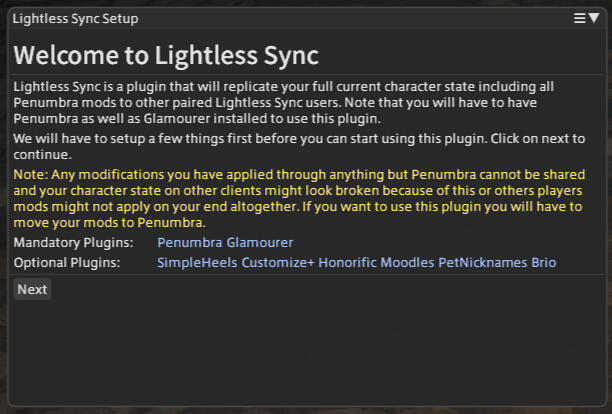
That will take you to the Agreement for Lightless. READ IT!After 60 seconds, you will then be able to click on continue and move forward.

Now, we will set up your file storage folder. Similar to what I told you for the root folder in Penumbra, make a new folder in the base of a drive, preferably at the base of the drive you make the folder for Penumbra. BUT, don't put it IN your Penumbra folder. Click the folder as shown in the pic to the right, and navigate to the folder you made. Make sure to follow the warnings and notes on the page when setting up your folder.
Hit Start Scan and let it scan your files. It will move on to the next step once the scan is done.
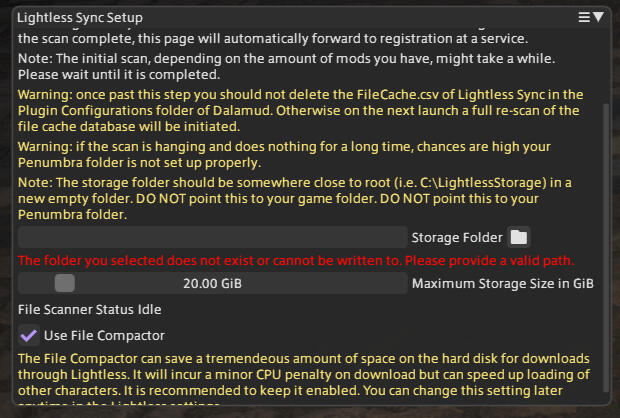
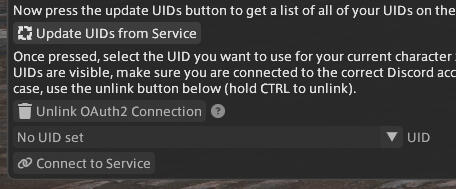
Since we have already set up your account, click "Check if Server supports Discord OAuth2" and wait for it to check. It should come back saying "Server is compatible with Discord OAuth2" so click on "Authenticate with Server" and look for a pop-up window in your browser. Log into Discord, and it will authenticate you! Close the window when it tells you that you can, and then go back to in game. Click on "Update UIDs from Service", then click the UID drop down and select the UID you want to use on the character you are logged in on. Then, just hit "Connect to Service" and you are connected!
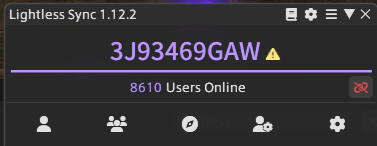
Make a decision on if you want Lightless to use your census data. This is only basic information, like you are a Au'ra Female. After you choose, it will bring you to the main page for Mare Synchronos. The number at the top is your UID, and is the code you want to share with others. They should also share theirs with you. You both need each others UID for this to work, unless you use Lightfinder. Click the code to copy it to your clipboard.
In the first available field on the main window, put your friends UID in and hit the + to add them.

If done correctly, they should be added. Happy syncing!
And that's it! Lightless is set up, and you will sync with your friend. Any changes in Penumbra or Glamourer they make will also be shown to you, once it has been downloaded. Repeat with the rest of your friends!
Optional Plugins that sync with
Lightless
The following plugins also sync with Lightless, and allow you to see a character fully as they wish for you to see them. While they are optional, it is recommended to install them for people that use them.
Customize+
Customize+, also known as C+, allows you to size your character to how you want to be seen, whether it be to make you thiccer or slimmer.
SimpleHeels
SimplyHeels allows you to edit the height of certain heels to allow them to stand correctly on the ground and not go into the floor.
Honorofic
Honorific allows you to set custom titles that are syncable through Mare Synchronos. You can set titles per role or class, and set if they come before or after your name.
All of these plugins can be installed as long as you have the Sea of Stars repo included here. Honorofic is a standard Dalamud native plugin and can be downloaded without a repo.
The Lightfinder
Not having anyone on your list can take the fun out of syncing with others. If you want to find potential new people (or syncshells) to sync with, use the Lightfinder! On the main page of Lightless, click the compass, and then hit Lightfinder! You will see a little icon appear above your head, as well as above others. If you want to add them, just right click them and choose to pair! If they accept, you will now be synced! But, I also said Syncshells, didn't I...

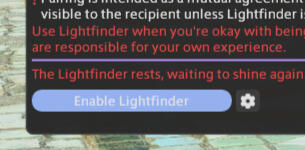
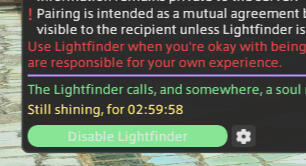
Syncshell Finder
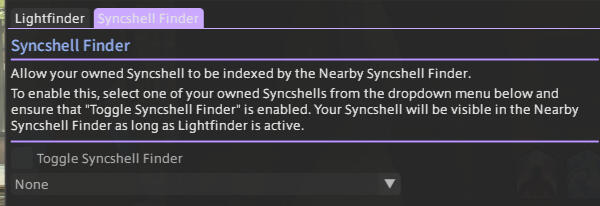
Just like the Lightfinder, if you own a Syncshell, you can choose to broadcast your syncshell and if people want to join it, they can do so by hitting Syncshell Finder right next to the Lightfinder button! Any syncshells in the area will show in the window that will appear. Just click "Join" and follow the prompts!If you want to broadcast your syncshell, click the Lightfinder button, and in the window that pops up, click the Syncshell Finder tab. Choose the syncshell you want to broadcast, and then check the Toggle option above the dropdown! You need Lightfinder enabled in order to broadcast your syncshell in the Syncshell Finder.


Lightless Texture Optimizations
So, have you been to a venue, or around a lot of people and someone slow your computer down? Well, let's see what you can do to make sure you aren't adding to the problem. This will go over a process you can do to help high VRAM. High triangles is more on the mod maker to do what they can to optimize it.
Before we get started, let's touch base on what VRAM and triangles are in case they don't make sense!
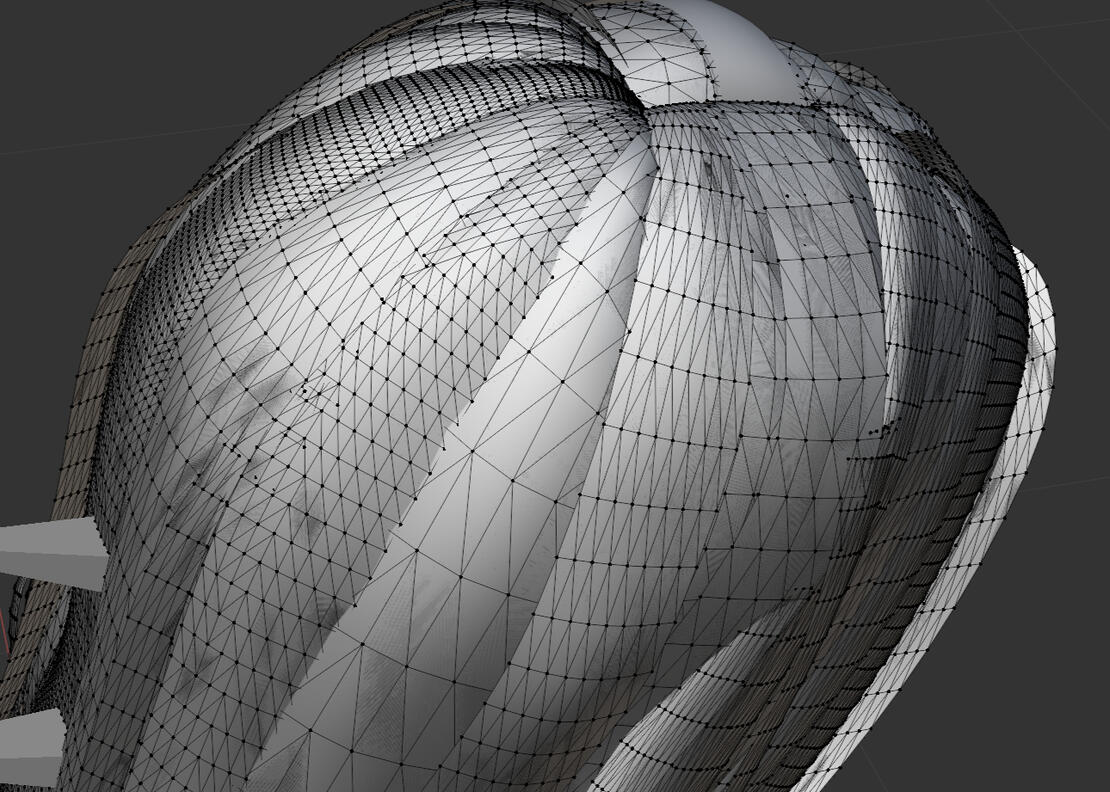
Triangles are what all models are made of that you don't actually see in game! The pic above shows an in game model in a way you can see the triangles!
VRAM on the other hand is how big the texture files are that are applied to the model to make you...you! So, if it is a bigger texture, like a 4k texture, it means the resolution of the file is 4096 x 4096, and that REALLY ramps up the amount of space that it takes. Now let's get into how you can reduce that!
Optimizations - Step 1
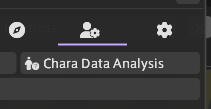
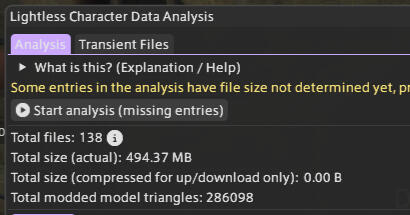
Let's start with how to see your own triangles and VRAM. If you open Lightless, click the person with a cog wheel by them, and click Chara Data Analysis, it will bring up a window. Click "Start analysis" and let it analyze you. It should eventually show you your actual size, as well as the total size when compressed and your modded triangles.
From here, let's click on the tex tab along the middle of the window!

Optimizations - Step 2
You should see a list of files. These are all the different textures that make up your look. From here, we will click on "Enable BC7 Conversion Mode". This will set a check box next to all of your textures that are not already using BC7 compression. You can click on each texture, decide if you want to compress it, and if you do, hit the check box next to it. Then, hit "Start conversion of (x) texture(s)" to begin letting your textures be compressed. After it finishes, your look should be much lower, making it easier on those around you!
From here, let's click on the tex tab along the middle of the window!
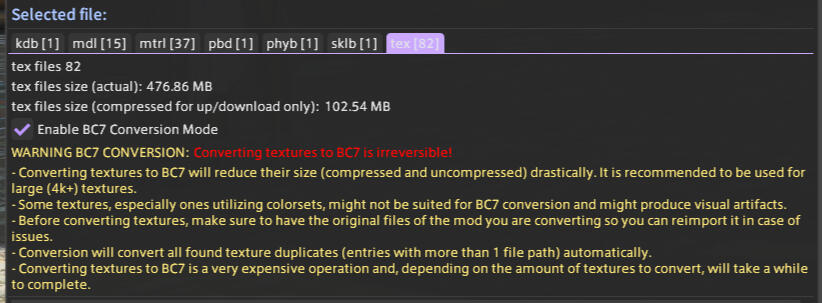
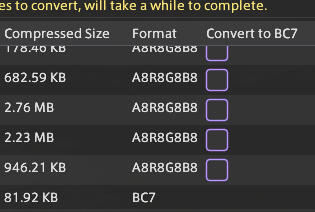
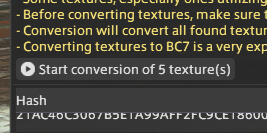
However, while this is a great way to reduce file size, if the file ends in "_n.tex" or "_id.tex", it may be best to leave those alone. Also, if doing this, it may also be a good idea to keep a backup of the mods in question in case you need to re-import them!
Before we get started...
The following is more advanced, and I wanted to give a stopping point before we go further. Colorset editing has a lot of moving parts, and for the purposes of this guide, I am going to only provide a basic idea of how to do it in Penumbra. To understand more of how colorsets work in depth, please click below.
Ready to start? Well then, let's go on an adventure!
Colorset Layer Definitions
To talk about colorsets, we need to define a few things first. I want to make sure you have an idea of what some parts of colorset editing are for. Those are :Diffuse - This is the base color
Specular - This is the color of the reflection in the layer
Gloss - How defined the reflection is
Emissive - How something glows
Dye Templates
We also need to talk about dye templates and how they function within Penumbra. They also are the same in Textools, but well...this is the Penumbra guide.
| 00 - Template IDs ending in 00 are "Default" Colors. | Example: 100, 200, 300 |
| 01 - Template IDs ending in 01 are "Darker" than default Colors. | Example: 101, 201, 301 |
| 02 - Template IDs ending in 02 are "Lighter" than default Colors. | Example: 102, 202, 302 |
This number can range from 100-612, but not every number is in between that. But, the higher the number, the glossier your layer will be. If a layer is set at 0, it will not be dyed and considered undyable.

How do I change the colorsets?
Now that we have done a brief overview, let's go through the steps on how to actually CHANGE the colorsets like you want. For the purposes of this guide, I can't instruct you exactly on what you will need to change specifically, but moreso guide you on how to do it. If you make too many edits, just find the one you want, delete the newly created mod, and do it again correctly the next time!Also, please note that not all mods use the colorsets and may not be able to be edited using this guide.
Please note that the steps in this guide are provided by the lovely and amazing Genie of the Moon, Nova. The original steps are listed here.
Step 1
Like other processes, the first step is to make a mod to make the edits in. This makes it so you don't actually affect the original mod.
Step 2
Now we need to find the material we want to work with. While you could just go to the Materials tab and play around, there are steps you can take to pinpoint what you need.In order to do so, the mod in question needs to be showing and equipped. You can do this either by actually equipping the item, or by having Glamourer load the item into you. Once it is equipped and visible, click on Advanced Settings in youre new mod, and go to the "Import From Screen" tab.

Step 3
Now that we are on the Import From Screen tab, click the plus next to the modded item to drop down the material list. Please note that the mod in question may have one or multiple layers, so you may need to look further into the layers for more information. You can hit the plus next to each layer and it may provide more information but I can't guarantee it will. As we made a new mod, I would suggest adding all the layers you feel may be relevant and if they aren't, you can just delete that layer.When you know what layers you want to add, click the paper to the right to add a copy of the material to your new mod. For my example, I don't want Material #1 as that is my piercings, and I don't want the skin textures, so I will hit the paper for Material #2.

Step 4
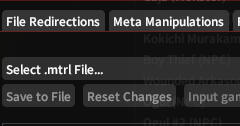
Now, we can go to the Materials tab to make the edits. Just click where it says "Select .mtrl File..." and click on the layer you want to make changes to. If you selected multiple and don't know which one, feel free to play around to see if you can figure it out. You can always delete the material and re-add it if needed.
Step 5
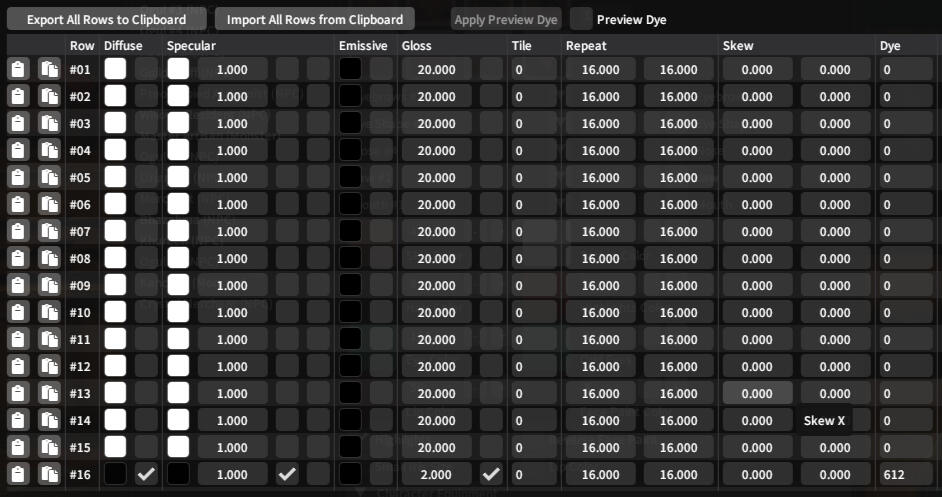
Now, make your edits! Feel free to use the information and resources provided at the beginning of the guide for help in how and what to change. You can edit the Diffuse, Specular, Emissive, Gloss and other more advanced features from here! Make sure to check the Dye column as it may provide some assistance as well. In my example, only one layer is set to something other than 0, so that would be the only layer affected by dyes in game.
Step 6
Once all edits have been made, just make sure to Save to File and the redraw to apply any edits made! Feel free to continue to re-edit as needed till you see the results you are looking for!
Before we get started...
The following is more advanced, and I wanted to give a stopping point before we go further. Colorset editing has a lot of moving parts, and for the purposes of this guide, I am going to only provide a basic idea of how to do it in Penumbra. To understand more of how colorsets work in depth, please click below.
Ready to start? Well then, let's go on an adventure!
Colorset Layer Definitions
To talk about colorsets, we need to define a few things first. I want to make sure you have an idea of what some parts of colorset editing are for. Those are :Diffuse - This is the base color
Specular - This is the color of the reflection in the layer
Gloss - How defined the reflection is
Emissive - How something glows
Dye Templates
We also need to talk about dye templates and how they function within Penumbra. They also are the same in Textools, but well...this is the Penumbra guide.
| 00 - Template IDs ending in 00 are "Default" Colors. | Example: 100, 200, 300 |
| 01 - Template IDs ending in 01 are "Darker" than default Colors. | Example: 101, 201, 301 |
| 02 - Template IDs ending in 02 are "Lighter" than default Colors. | Example: 102, 202, 302 |
This number can range from 100-612, but not every number is in between that. But, the higher the number, the glossier your layer will be. If a layer is set at 0, it will not be dyed and considered undyable.

How do I change the colorsets?
Now that we have done a brief overview, let's go through the steps on how to actually CHANGE the colorsets like you want. For the purposes of this guide, I can't instruct you exactly on what you will need to change specifically, but moreso guide you on how to do it. If you make too many edits, just find the one you want, delete the newly created mod, and do it again correctly the next time!Also, please note that not all mods use the colorsets and may not be able to be edited using this guide.
Please note that the steps in this guide are provided by the lovely and amazing Genie of the Moon, Nova. The original steps are listed here.
Step 1
Like other processes, the first step is to make a mod to make the edits in. This makes it so you don't actually affect the original mod.
Step 2
Now we need to find the material we want to work with. While you could just go to the Materials tab and play around, there are steps you can take to pinpoint what you need.In order to do so, the mod in question needs to be showing and equipped. You can do this either by actually equipping the item, or by having Glamourer load the item into you. Once it is equipped and visible, click on Advanced Settings in youre new mod, and go to the "Import From Screen" tab.

Step 3
Now that we are on the Import From Screen tab, click the plus next to the modded item to drop down the material list. Please note that the mod in question may have one or multiple layers, so you may need to look further into the layers for more information. You can hit the plus next to each layer and it may provide more information but I can't guarantee it will. As we made a new mod, I would suggest adding all the layers you feel may be relevant and if they aren't, you can just delete that layer.When you know what layers you want to add, click the paper to the right to add a copy of the material to your new mod. For my example, I don't want Material #1 as that is my piercings, and I don't want the skin textures, so I will hit the paper for Material #2.

Step 4
Now, we can go to the Materials tab to make the edits. Just click where it says "Select .mtrl File..." and click on the layer you want to make changes to. If you selected multiple and don't know which one, feel free to play around to see if you can figure it out. You can always delete the material and re-add it if needed.
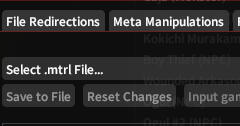
Step 5
Now, make your edits! Feel free to use the information and resources provided at the beginning of the guide for help in how and what to change. You can edit the Diffuse, Specular, Emissive, Gloss and other more advanced features from here! Make sure to check the Dye column as it may provide some assistance as well. In my example, only one layer is set to something other than 0, so that would be the only layer affected by dyes in game.
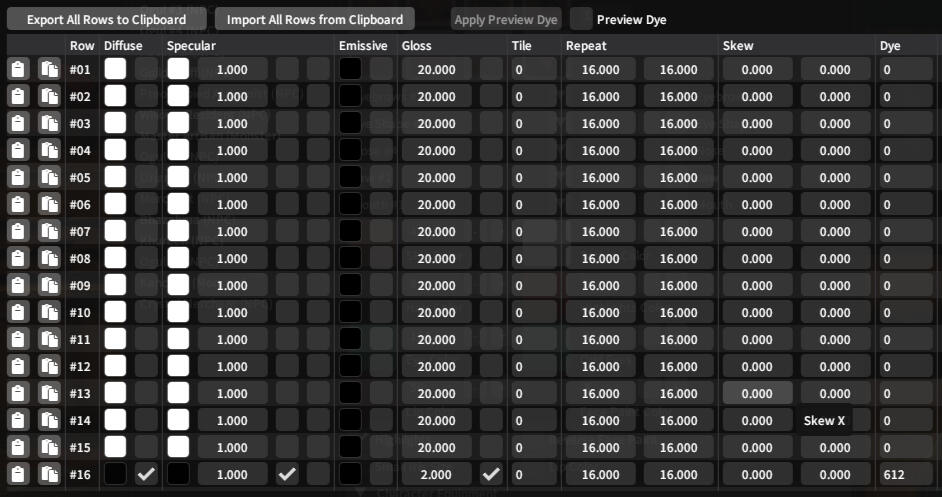
Step 6
Once all edits have been made, just make sure to Save to File and the redraw to apply any edits made! Feel free to continue to re-edit as needed till you see the results you are looking for!
What is Brio?
Sometimes you like to take some gposes but your friends are not available. So how do you get around this without just doing it when they are available? With MCDO from Mare and Brio, you can pose with or without your friends there! Let's go into what MCDO is, as well as how to use Brio!
What is MCDO?
MCDO stands for Mare Character Data Online, and is a service that allows you to create options for your friends or acquaintances to be able to pose with you even if you are not together or are able to be online at the same time. It allows them to load a version of you to use in gpose! And they stay online so you don't need to hand out links to a Google Drive or send them files of you! And you can choose who gets access and how they access it!
How do I set up MCDO?
Bring up Mare, and then click on the far right icon with a person and a gear. Click on Data Creation, and you see any MCDFs set up through MCDO. Make sure your character looks like how you want, then hit "New Character Data Entry". Name it in the General section, set who you want to see it in the Access and Sharing section, hit "Set Appearance to Current Appearance" for it to add your appearance, and then save it! If you selected to use a code, make sure to hit the copy button next to the code at the top! If you chose to share it, it will automatically be available to whoever you give access to! You can also add poses to your MCDO in /gpose, pose together with you and your friends in GPose Together, or make an MCDF like before!
How do I setup/use Brio?
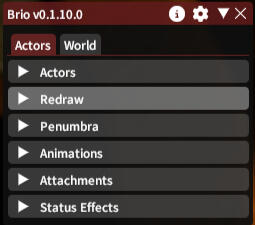
As long as you have the Sea of Stars repo set up, you can go into Dalamud Plugins, make sure you are on All Plugins, and search for Brio. While in Gpose, Bring Brio up by typing /brio. To add actors, make sure you are in the Actors section, and click Spawn. Spawn as many actors as needed, and then target them and apply an MCDF you made for the actor you created. If you don't have an MCDF, you can also use Glamourer to change the Actor to the model you want it to be.
You can use the Penumbra section to apply different collection to the actor, Animations to make the actor do specific animations, Attachments to attach different ornaments, mounts, or minions to the actor, and you can also look at or change the effects present on the actor.
Before we get started...
If you are here, you are looking for more information about what path you need, or what body mod you use. Let's break down each layer, as well as what each body mod looks like so you can easily identify what path you need! Also, please look over the Skin In The Game section provided by Aleks if your skin doesn't look right!
Already know what these are? Then let's get you back to the guide!
So what is a Normal Layer?
Does your texture look like this?
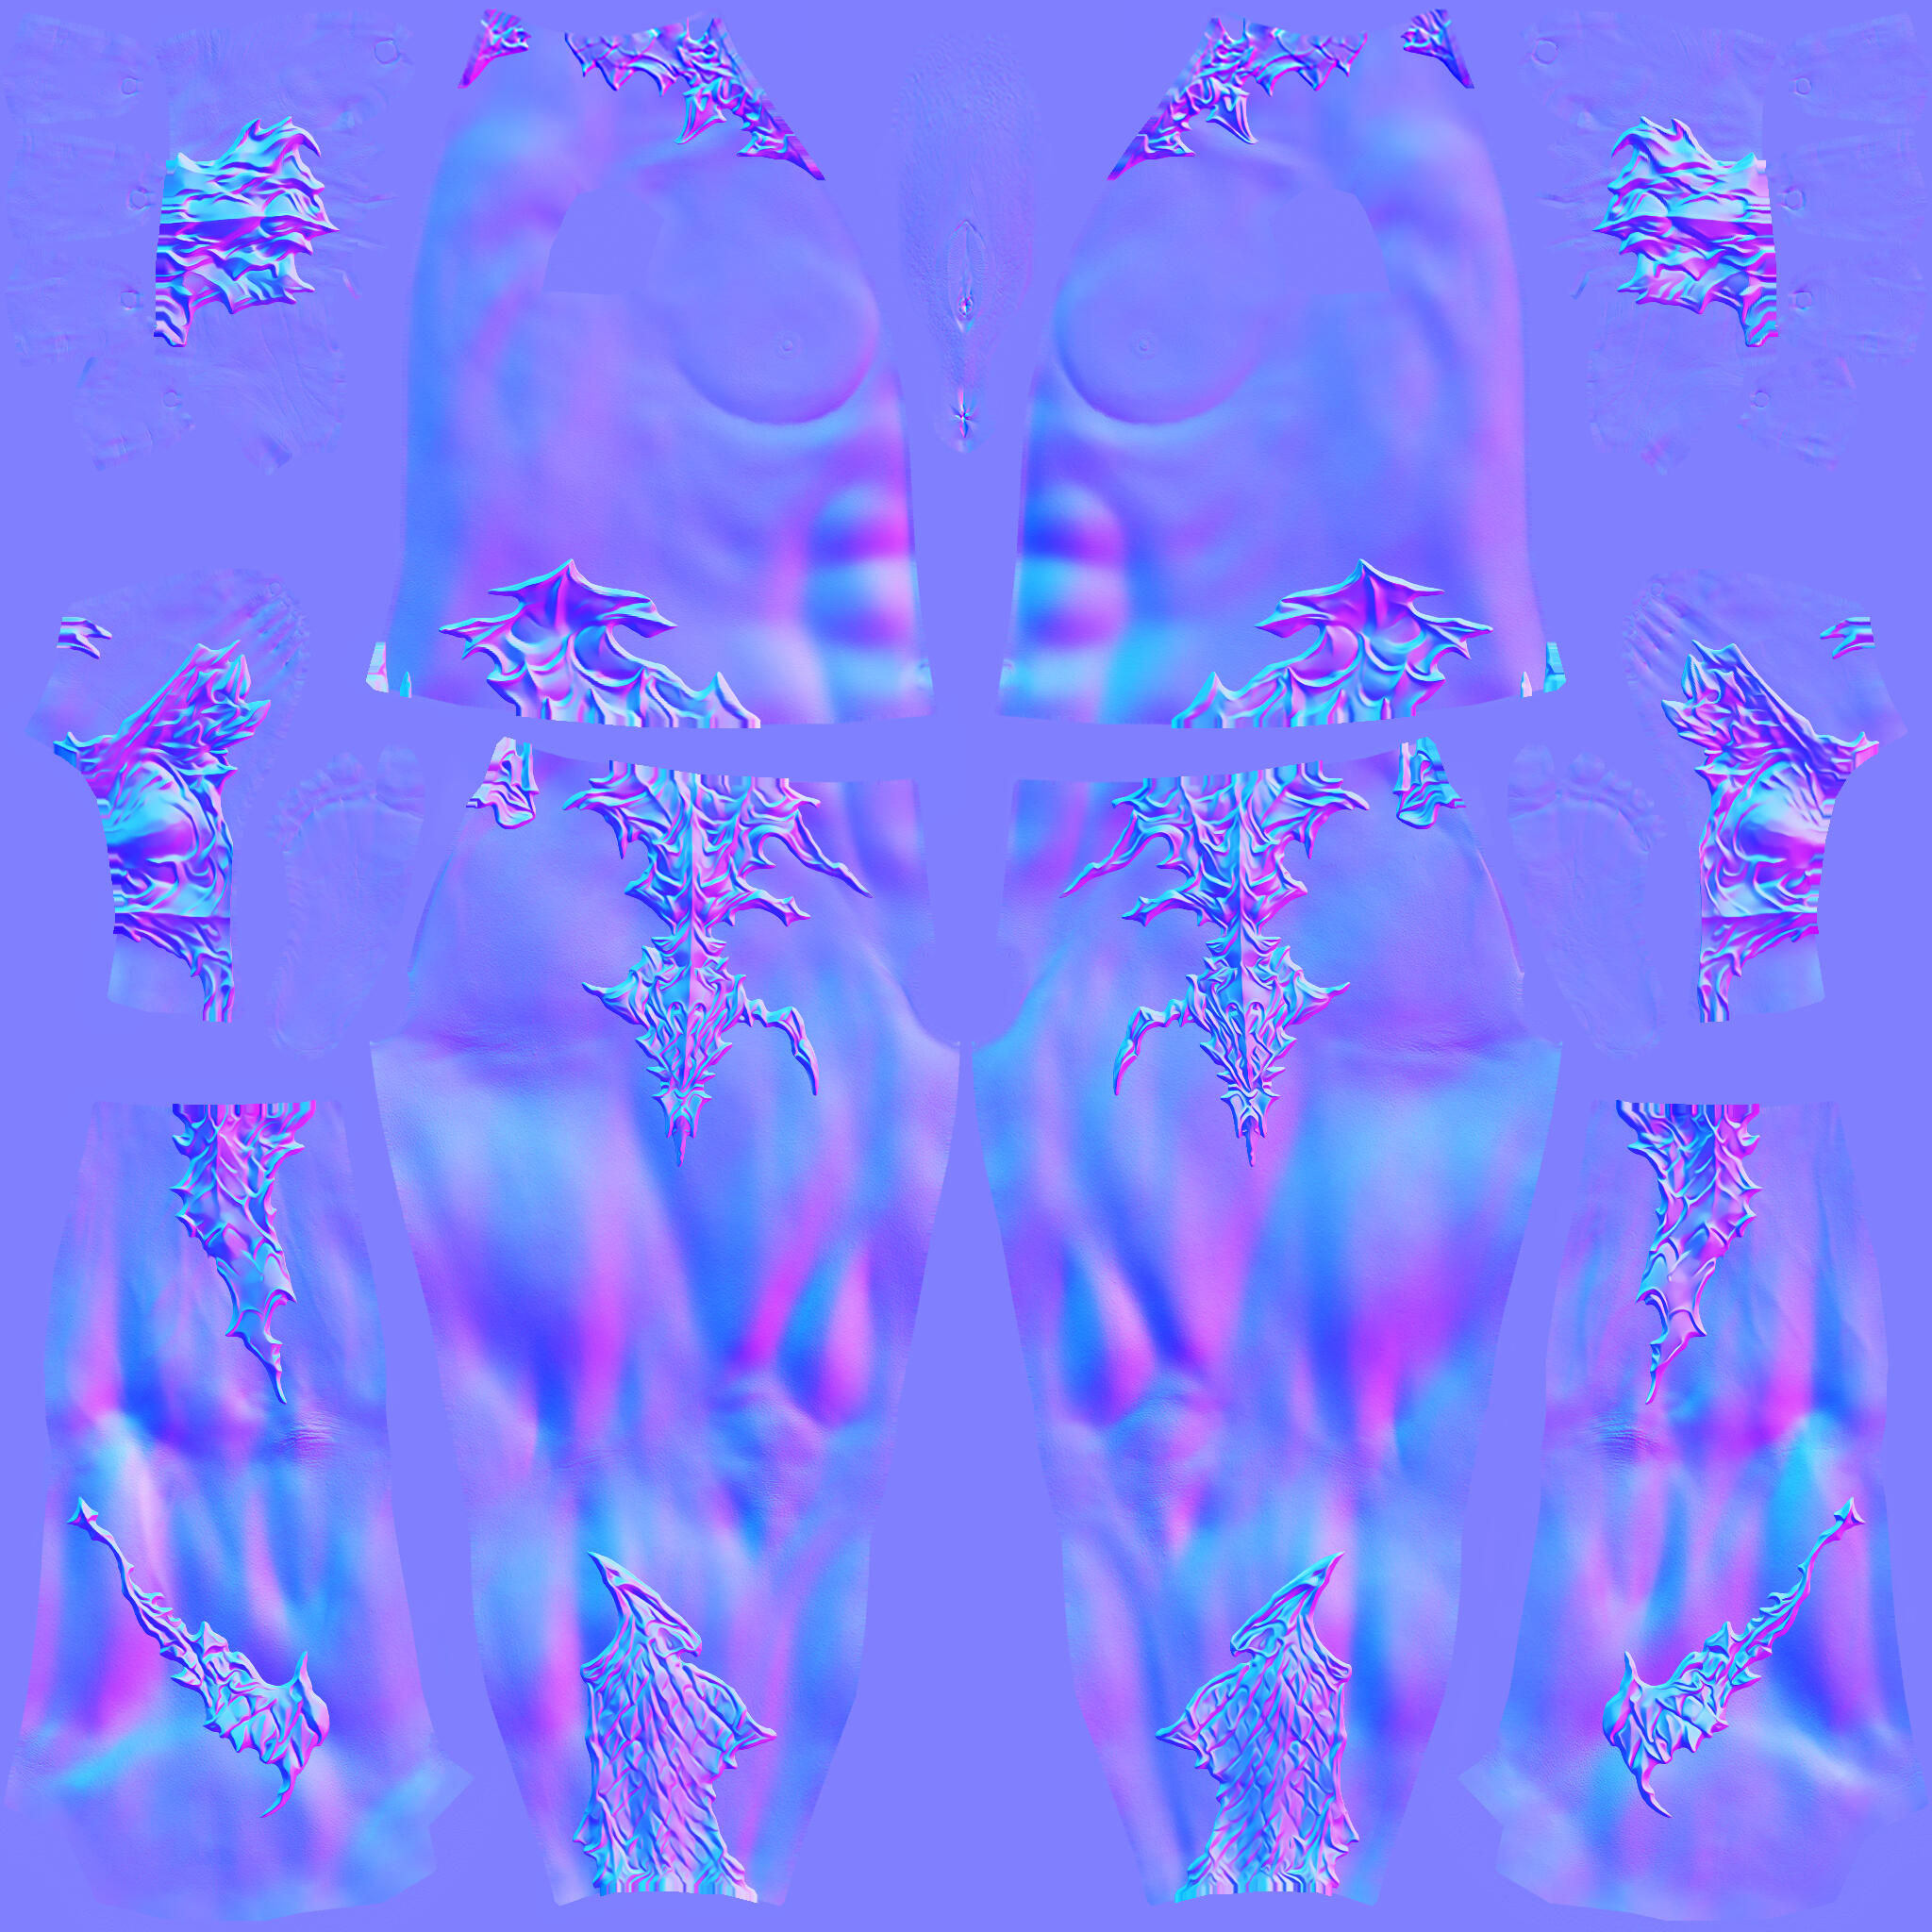
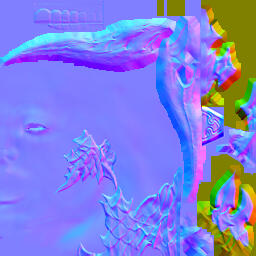
If so, this is the layer you need. This layer tells the game how things should handle light on the object or how it hits it, whether it be on your face or your body. This will mainly be for aura scales or muscle textures, but a few tattoos also use them to make them look 3D.Not the texture you are looking for? Try a different layer!
Ready to go back to the guide?
So what is a Diffuse Layer?
Does your texture look like this?
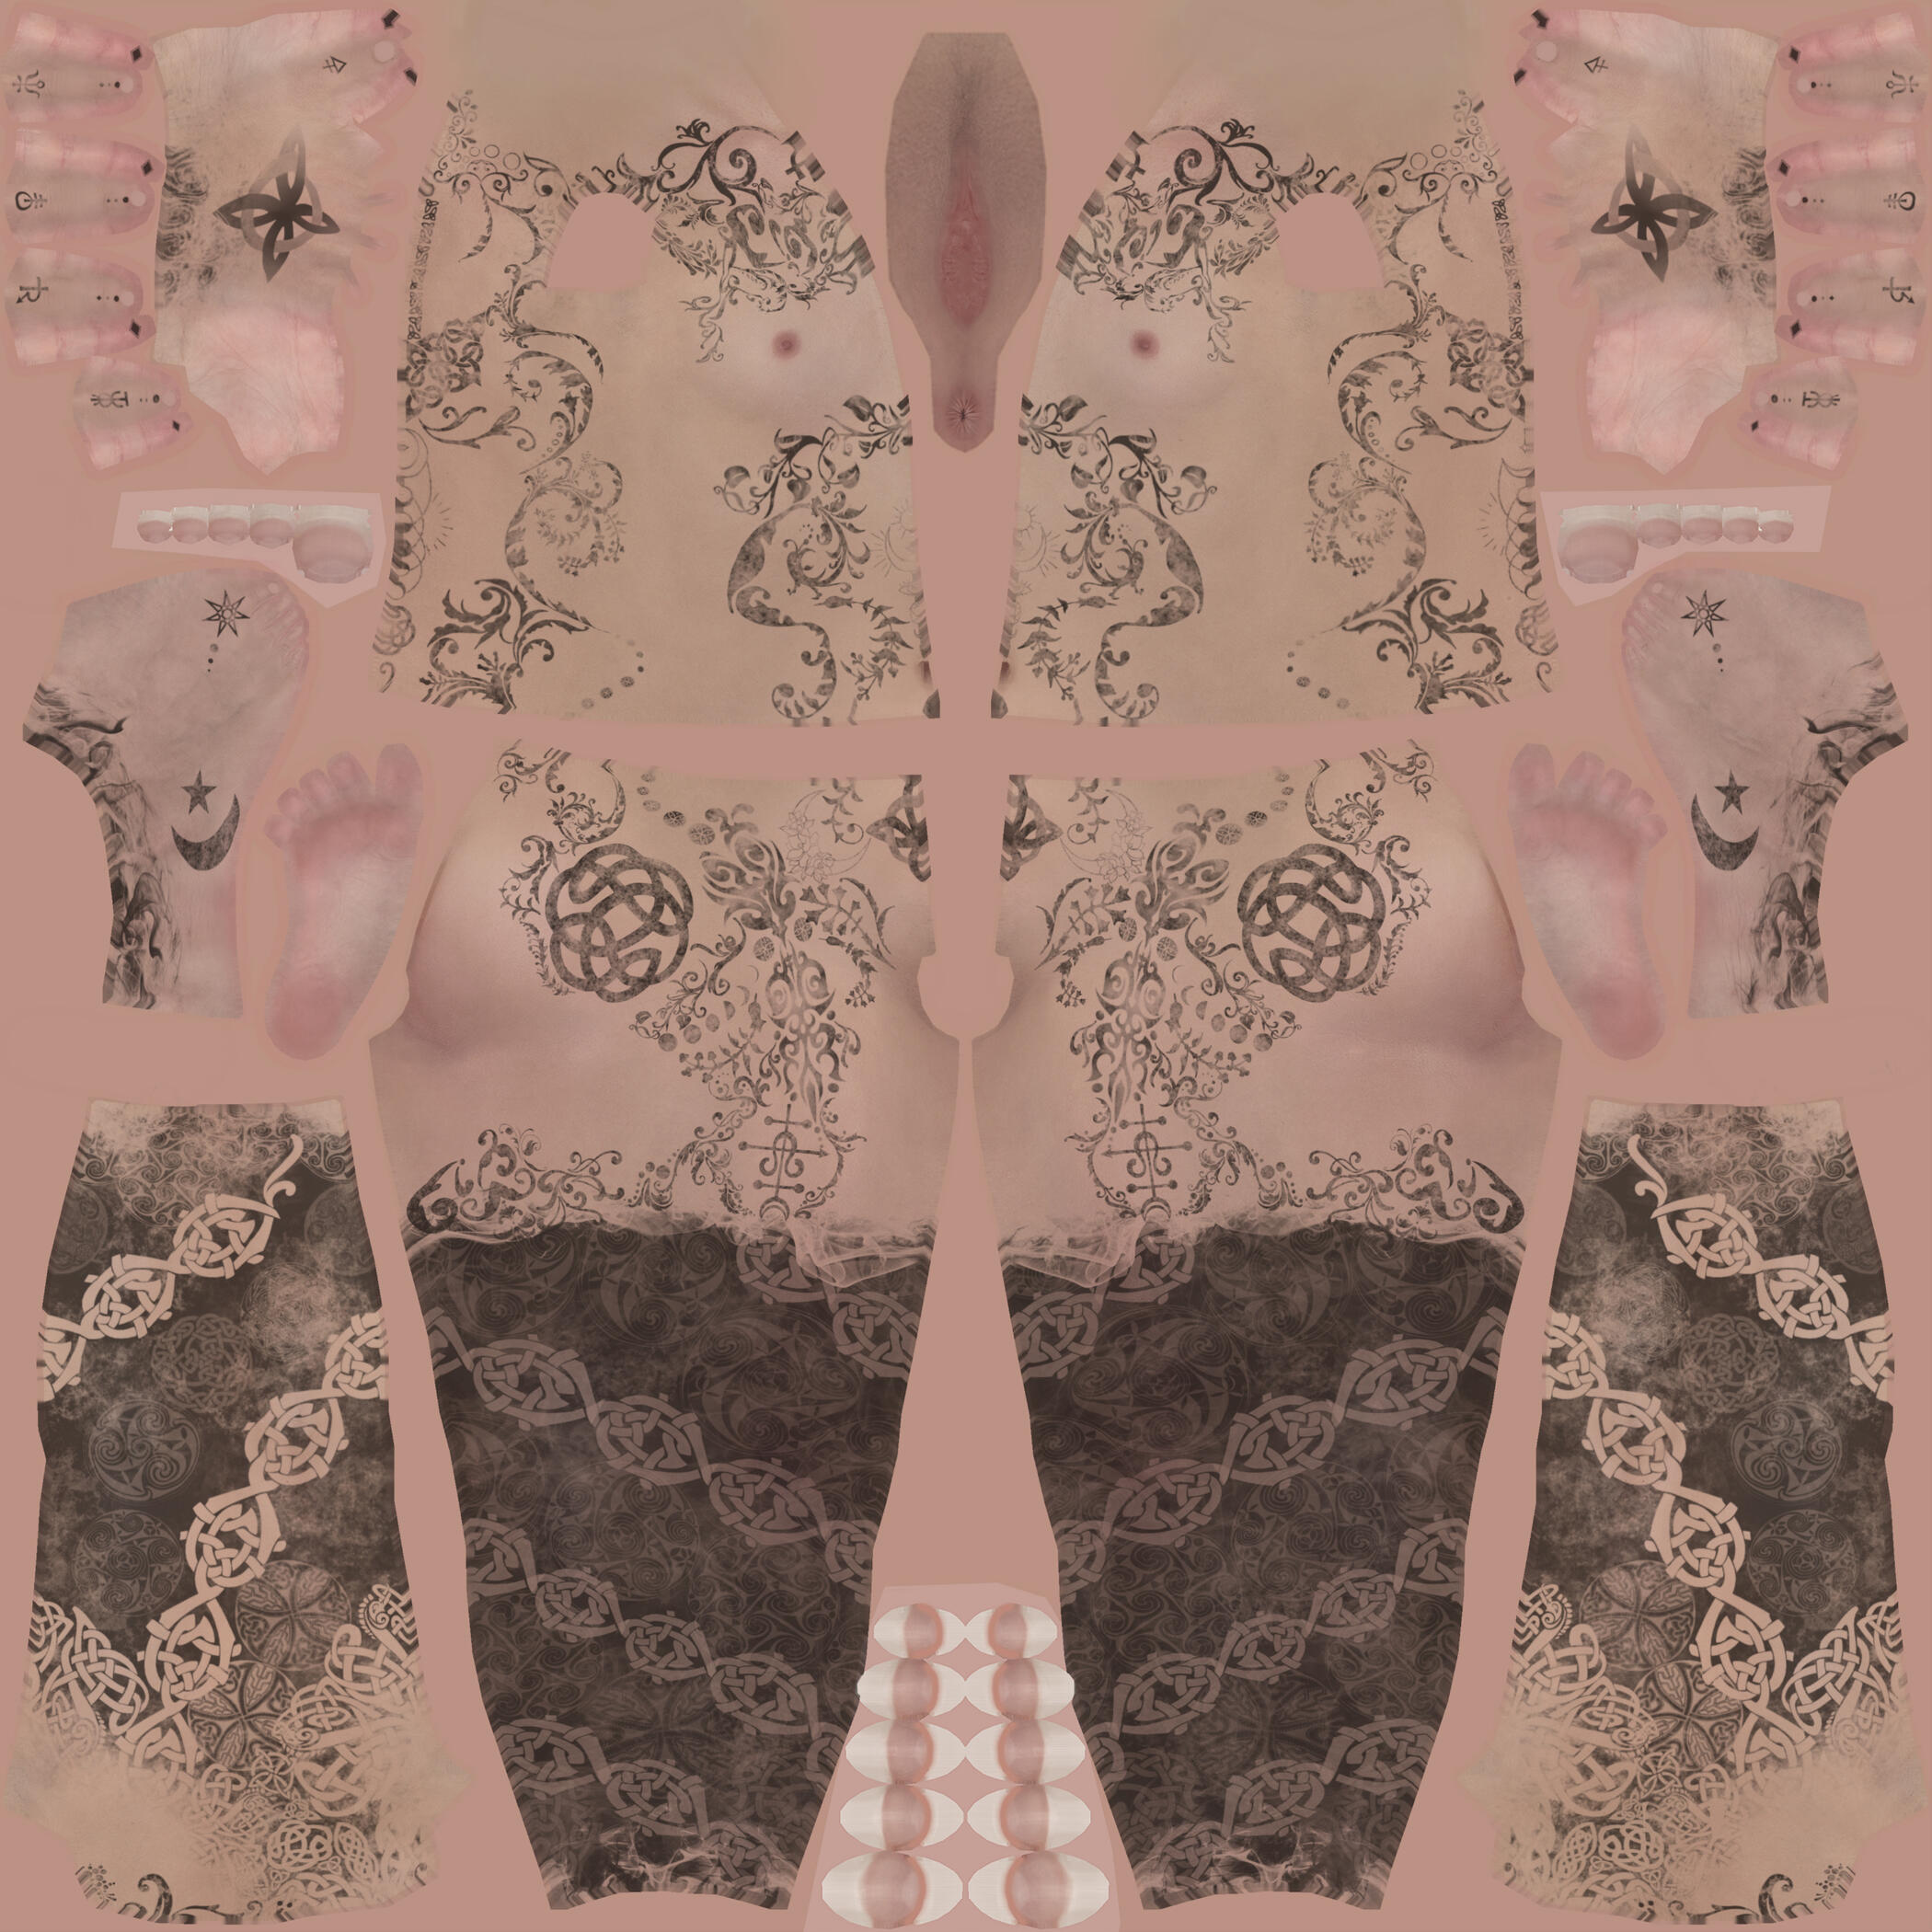
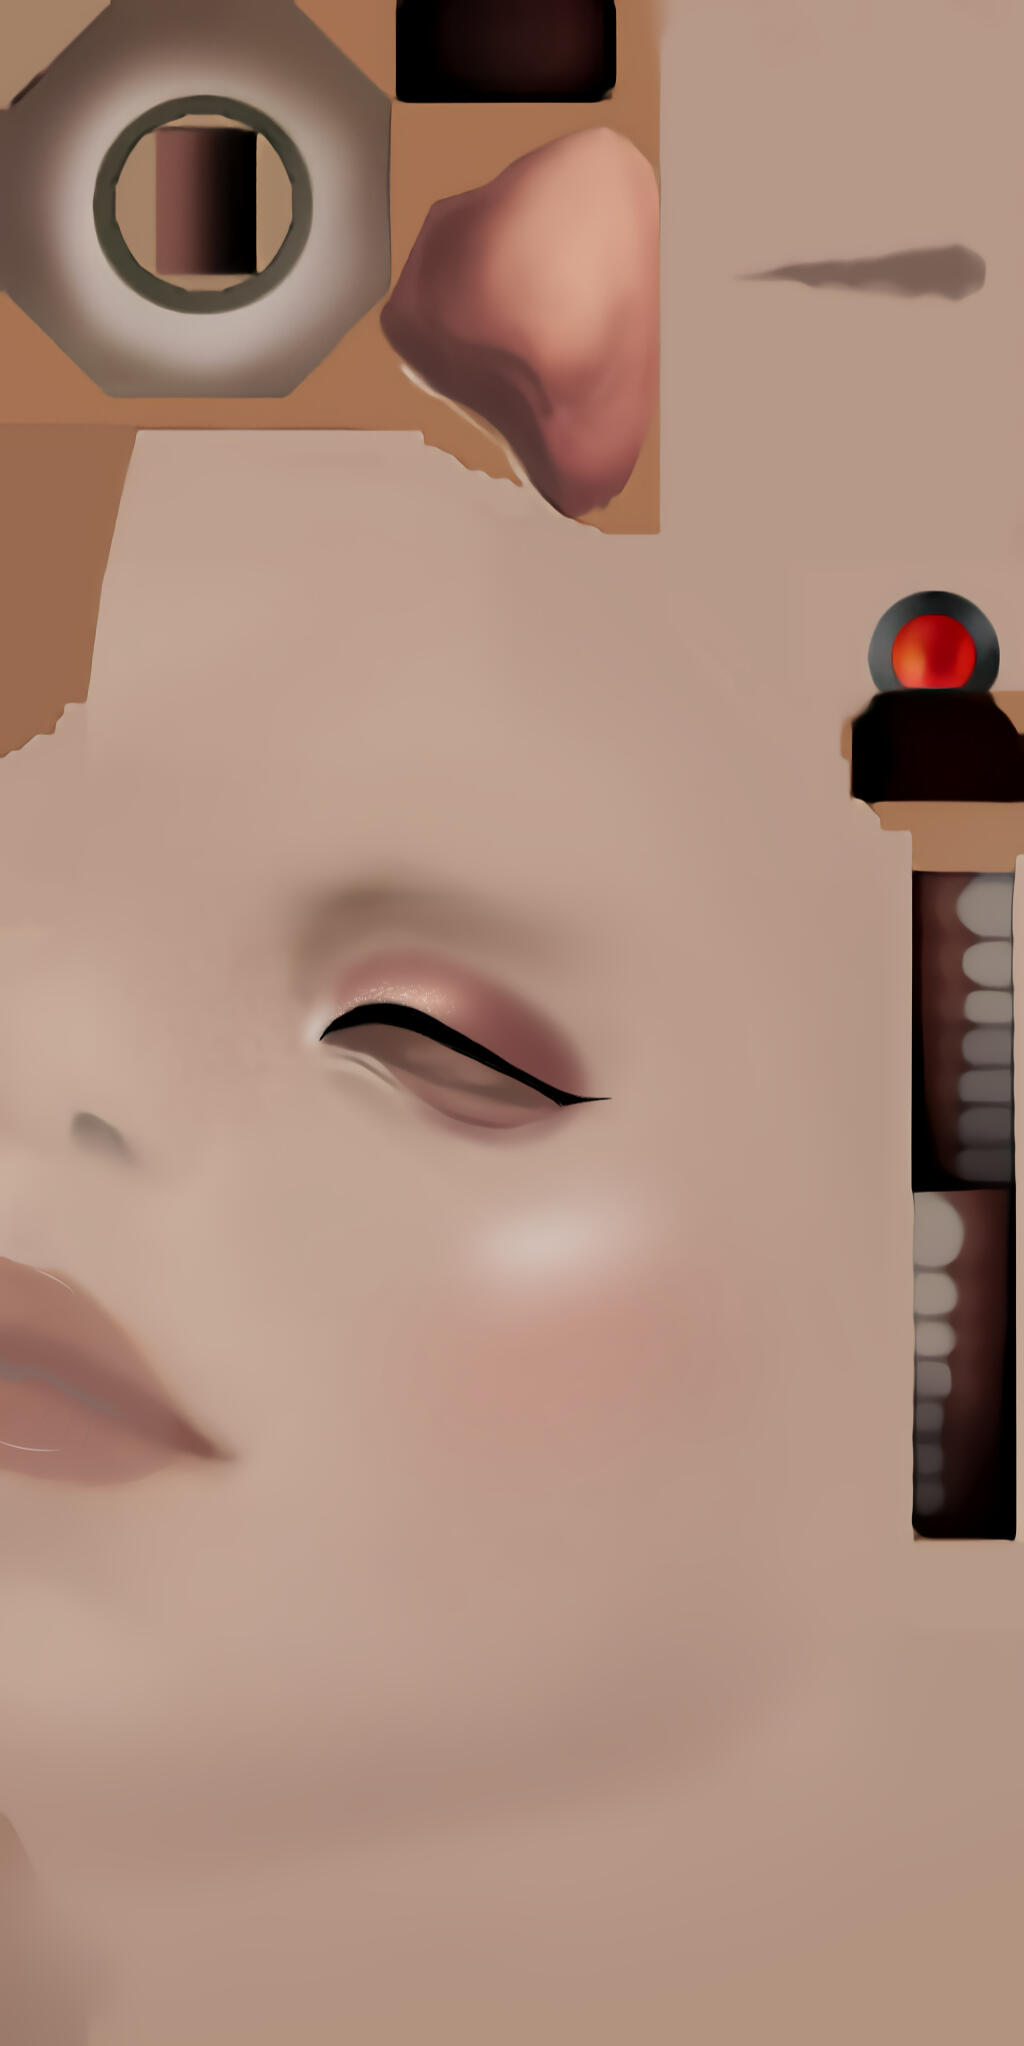
If so, this is the layer you need. This layer wraps around your body and is what your skin will look like to all around you. This will mainly be for tattoos and makeups.Not the texture you are looking for? Try a different layer!
Ready to go back to the guide?
So what is a Specular Layer?
Does your texture look like this?
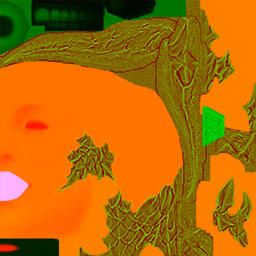

If so, this is the layer you need. This layer tells the game how light reflects off of the object as well as how eyes are textured. It also can affect eye glow with Atramentum Luminis. This will mainly be for tattoos or eye texture/glow, may be used in other settings as well.Not the texture you are looking for? Try a different layer!
Ready to find your path?
So what body mod do I need?
What does your texture look like? Look for the one that matches and look what it is labelled!
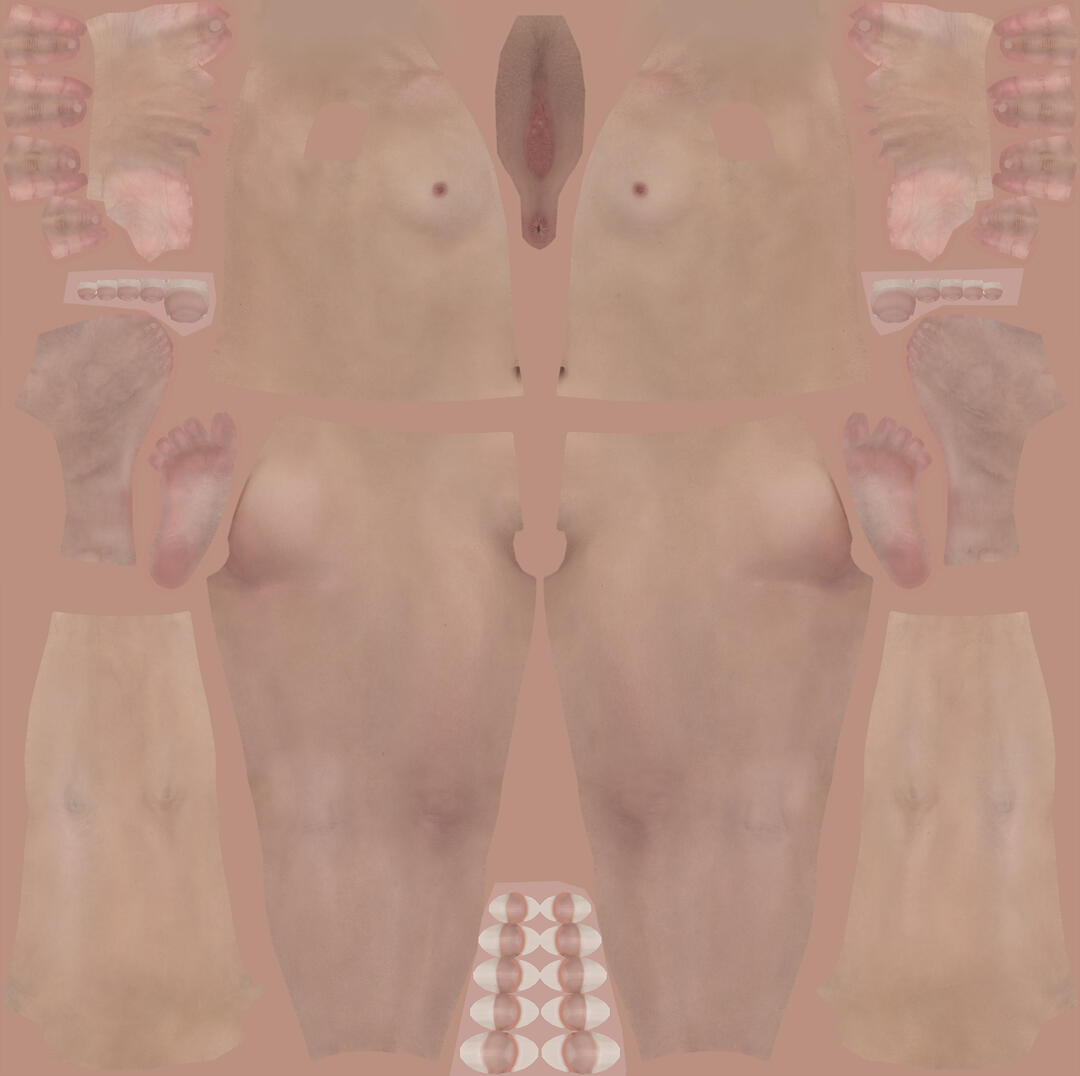
BIBO(YAB, Venus, Uranus, Lithe)
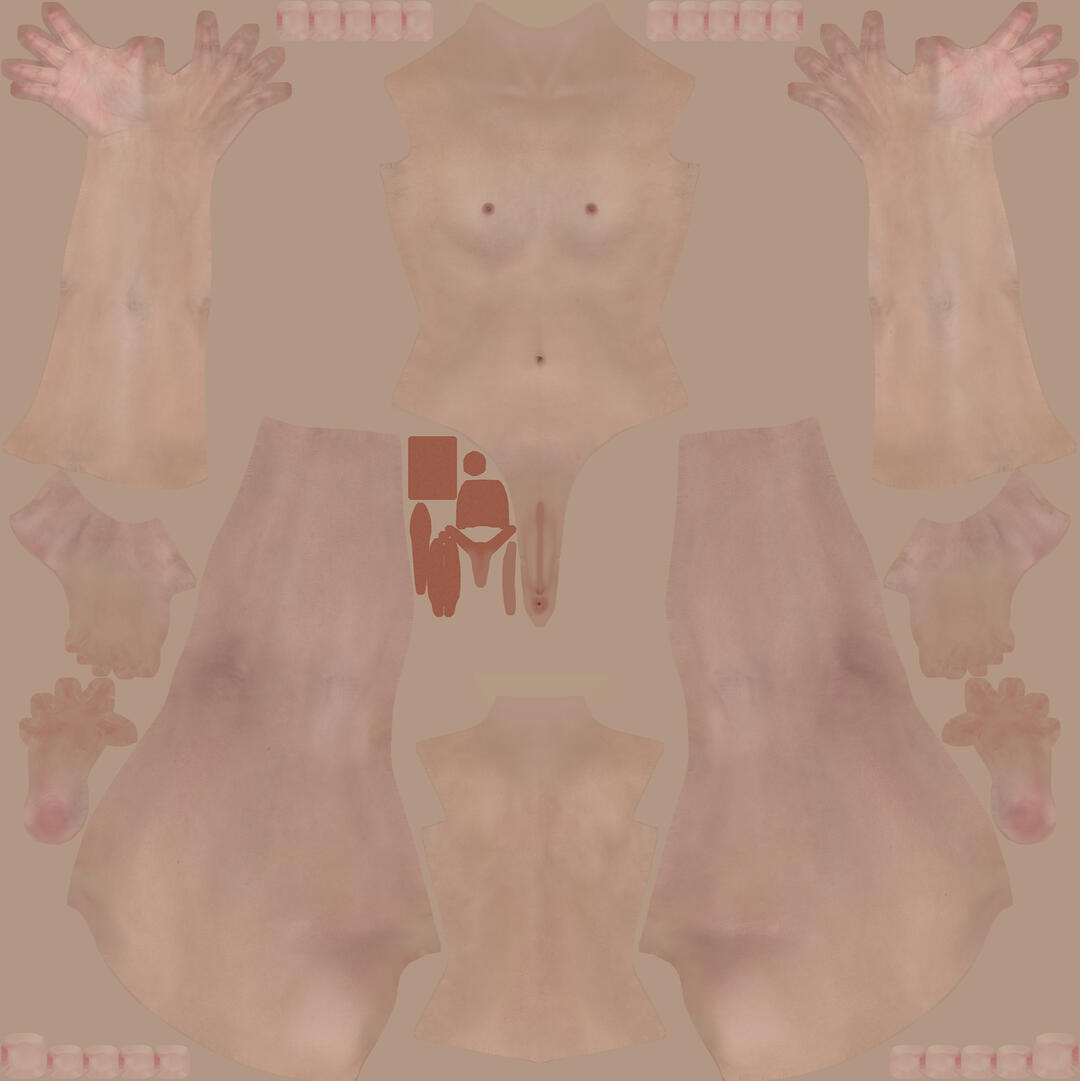
Gen3
(T&F Gen3, EVE, Freyja)
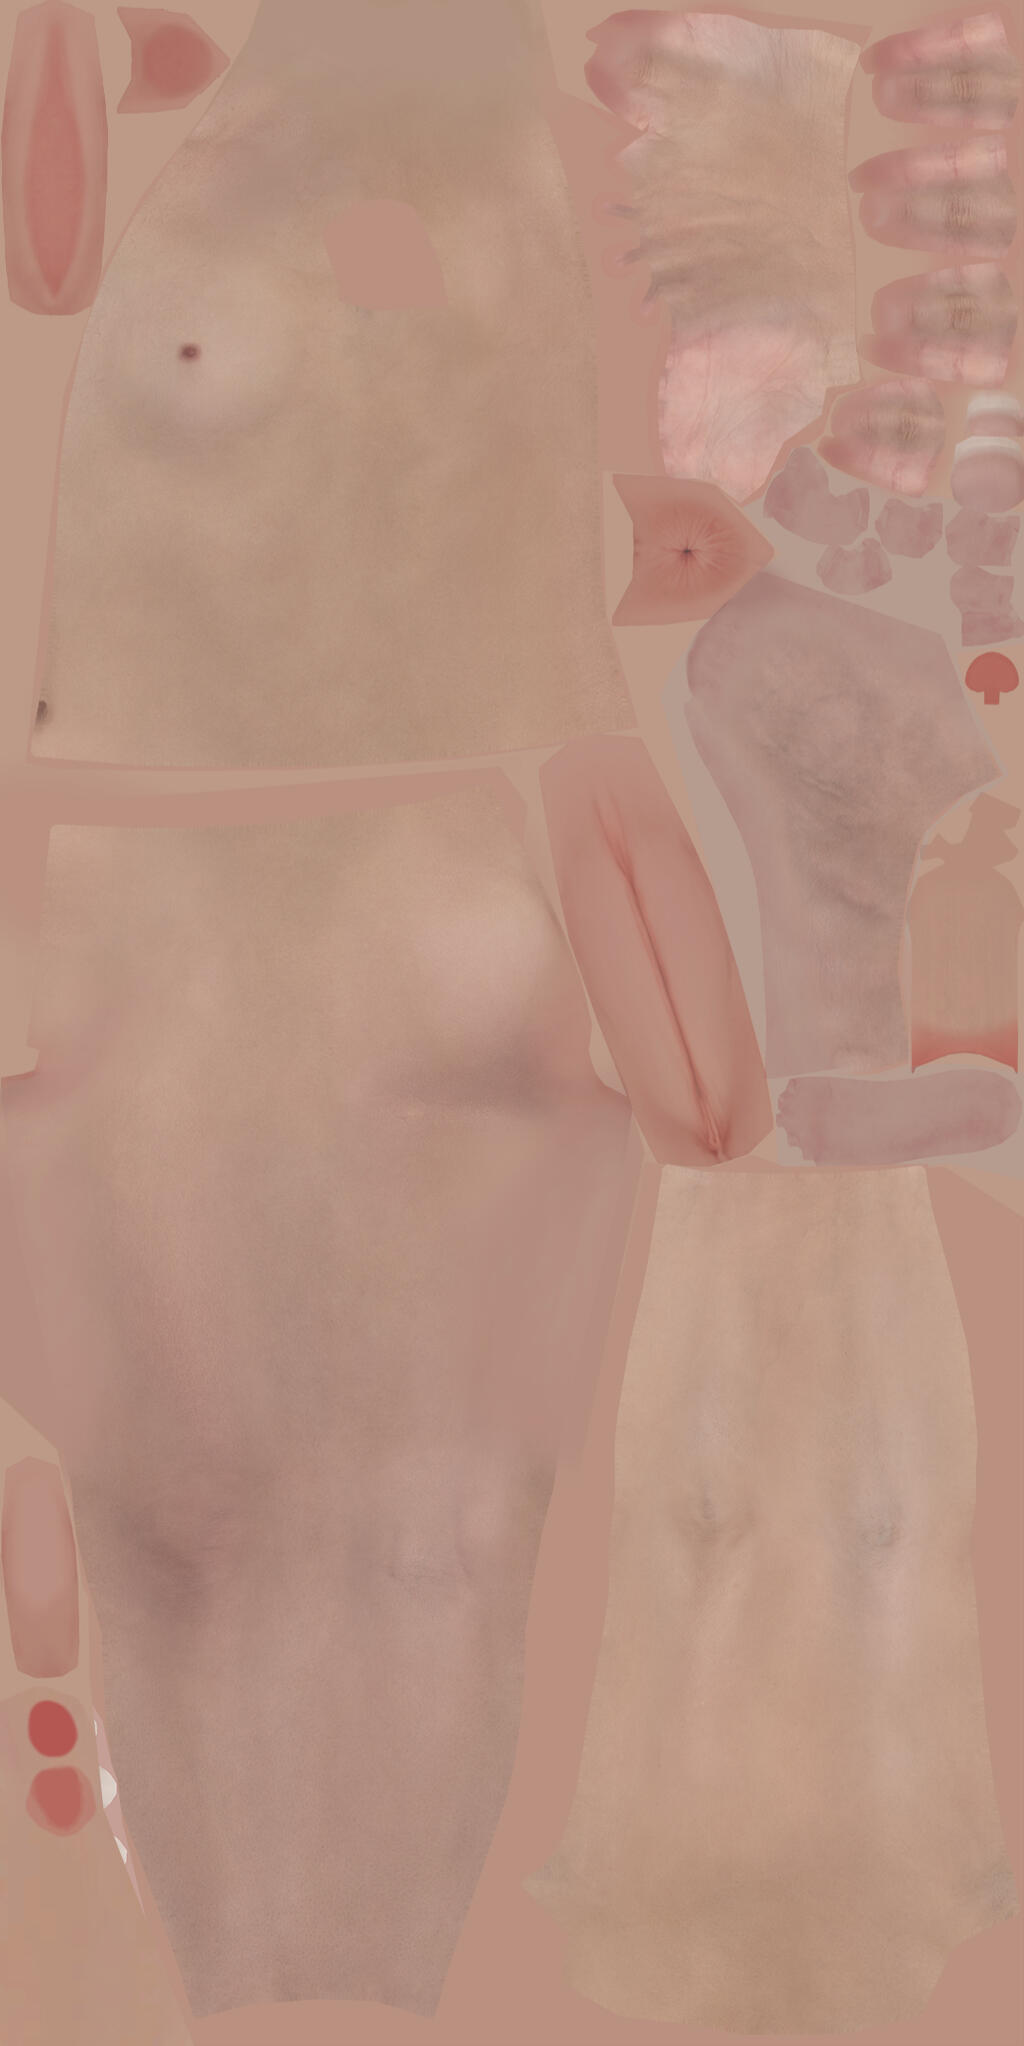
Vanilla/Mat A
(Male and Female)
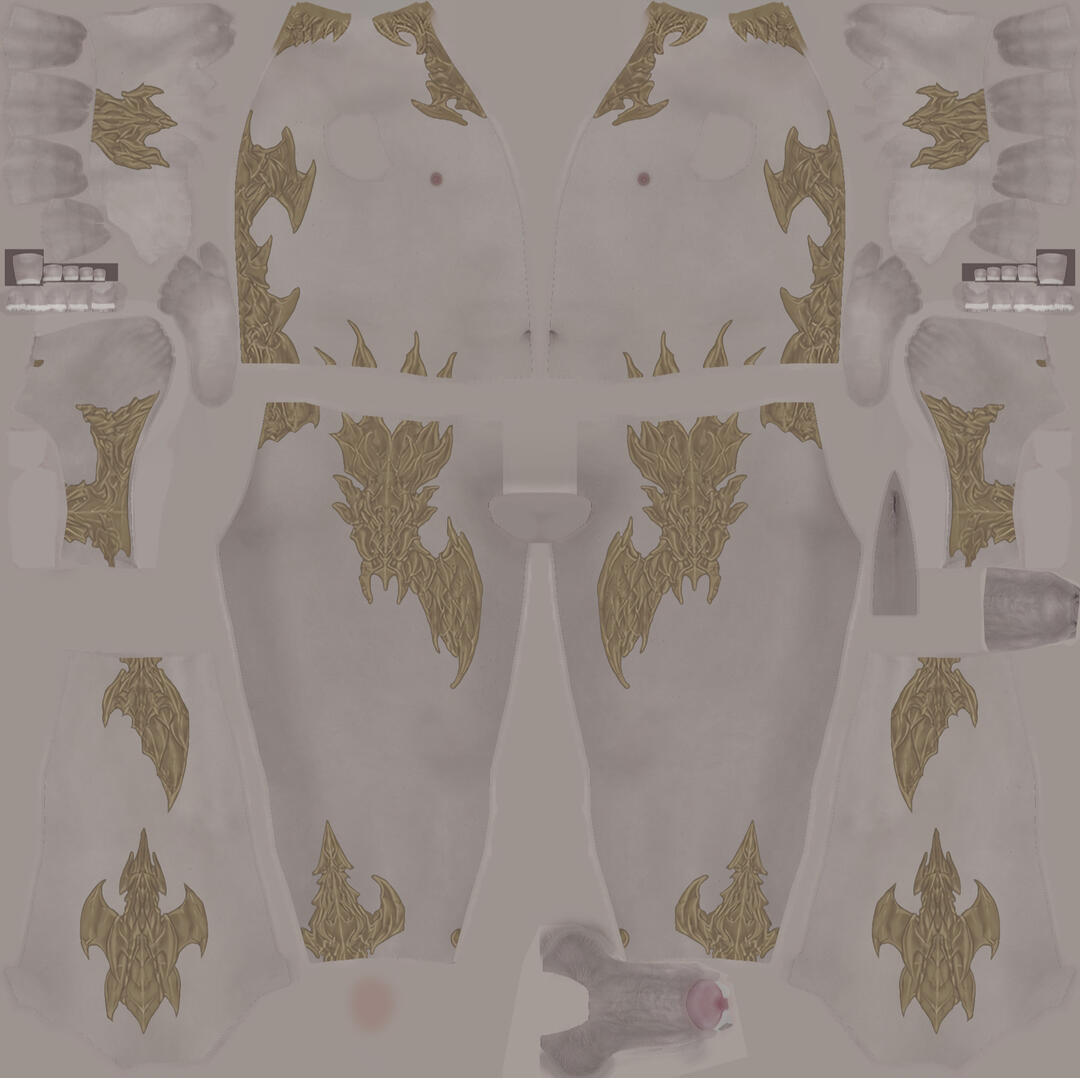
TBSE/HRBody3
(Sorry guys! This is it!)
Bibo and Gen3 are for female bodies, and TBSE/HRBody are for males. Please note that the Mat A is a female body, but the male Mat A looks similar. Want to go back to the layers?
Ready to go back to the guide?
Atramentum Luminis (ALum)
The Reni Guide Breakdown
So you may have heard the term ALum, or saw people with glowing eyes/tattoos/hair and are wanting to do that for yourself but didn't know how to do it? For ALum, it is too in depth with too much going on to just be one guide, so let's break this down in multiple guides!
So...what is
Atramentum Luminis?
Atramentum Luminis (also called ALum throughout) is "a framework to add various effects to your skin, hair and iris by changing how the shaders work." With that in mind, you can ALum to make skin, tattoos, hair, or eyes glow for the desired effect you are looking for. I will go into depth about how to do all these things in the guides provided on the previous page. Let's go into depth on how to add the effect you are looking for! Join me based on what you want to do!ADVANCED GUIDES IN THIS SECTION WILL BE LABELLED AS SUCH
So...how do I get ALum?
ALum itself is a mod just like any other mods you may download for clothes, hair, tattoos, or whatever else you may want. However, it does nothing on its own but allows the game to do things it doesn't usually do normally.You can get it from XMA or Heliosphere like other mods. I personally recommend getting it from Heliosphere because then it will be auto-updated through any changes Ny, the creator of ALum, decides to make.
So...how do I make my eyes glow?
So, let's get into how to make eyes glow at a basic level. The obvious requirement is that you have ALum already set up in Penumbra, but for additional features, you can also make sure to set the Hair Framework to "Textures and Materials". For this guide (thanks Ny!) I will tell you how to make your eyes glow with some texture work in Photoshop/GIMP/Photopea or anything else.
Ready Ok cool! Let's get into it!
Step 1 - Get the Textures
So, either get an eye texture from a modding website, or if you just want to change your current eyes, go into the Import from Screen section, go to the Face, and then to the Iris, and save the material by clicking the page as shown to the right. Then, go to Textures and find the eye texture. We will be doing two exports here. For the first export, select the presets button and choose "Make Opaque (Drop Alpha)" and choose Export to PNG. For the second one, we will do "Extract Alpha", and then "Invert Colors", then export this one as well. If you are sitting here thinking "but it's just a black square", that is exactly what we want...for now.


Step 2 - Edit the Textures
Ok, so now that we have the two textures, open up Photoshop or whatever other photo editing software you want to use, and open both files. Duplicate the black square texture on top of the opaque texture. Now...this is a lil freehand to edit. To make the eye glow, you need to make the area you want to glow white and leave the area you don't want to glow black. Once you have used whatever tools you want to get the area white that you want to glow, save the black and white texture, and let's go back to Penumbra.
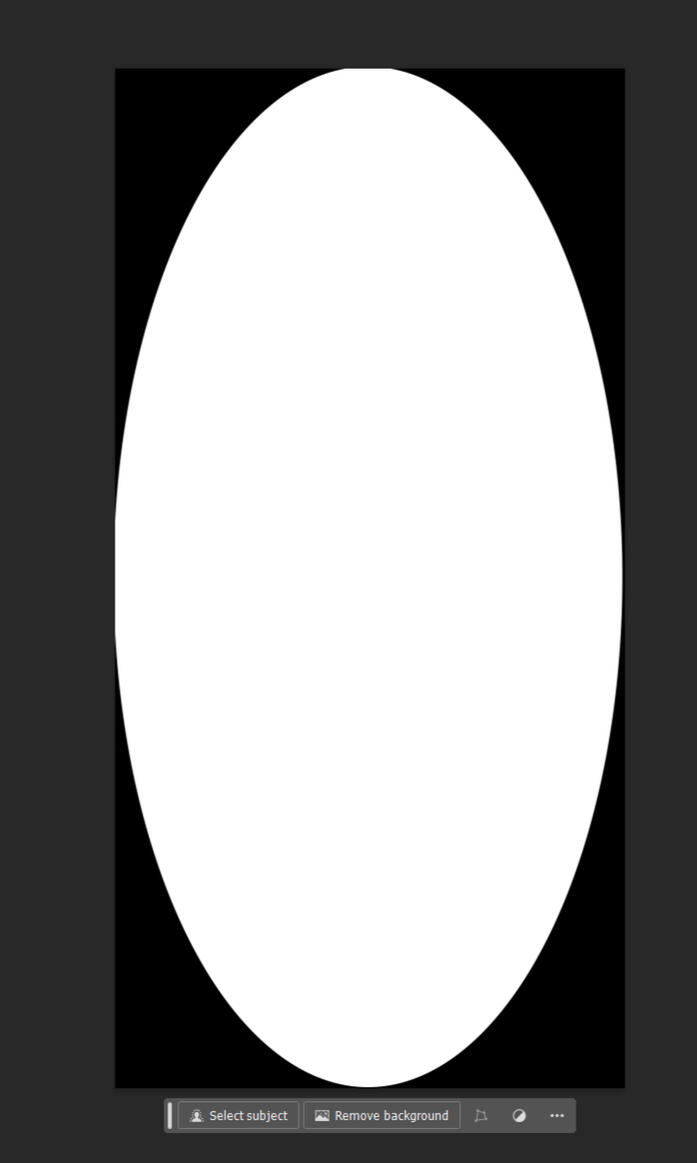
Step 3 - Import Into Penumbra
Now that we have our glow mask, go back to your game. The Textures tab should still be up, but if it is not, bring it back up and select your original texture again. Now, do not use the normal import button to import your texture back into Penumbra. Instead on the right side of the Textures window, you should see a grey bar and a little carat on it. If you click that, the Overly Texture section pops out. Click the folder on this side, select your alpha texture, choose "Grayscale to Alpha" (either one), click Invert A (not colors), and then change the settings below like I display to the right. After you do that, hit "Save in place", then let's start fine tuning!
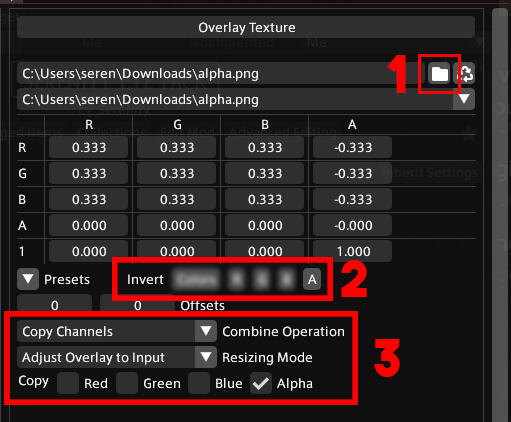
Step 4 - Edit the Material
Now that all the texture work has been done and saved, let's go to the Materials tab. You did select it like I asked in the earlier section, right? When you go to the Materials tab, there should be just the one texture in there. Click on it, and drop down the Material Constants section. Depending on what level of ALum you are on, you should see different options to use. For right now, we will stick with Level 2. You should have a section called [ALum] Emissive Glow. Now, depending on how you want to set this up, you will want to play around with different settings for each. For example, if you want to make it so your eyes don't glow when the light hits it, but does glow in shadow, set the well-lit environment options to 0 and the dark environments to the number you would like. I like to set the Emissive Conversion to 1, and the Legacy Bloom to 10, but this is all on you at this point. As long as the mod is active and applied, you can also hit "Reload live preview" to be able to change them on the fly to find a look you like!

Isn't this neat? One eye is not glowing and the other one is!
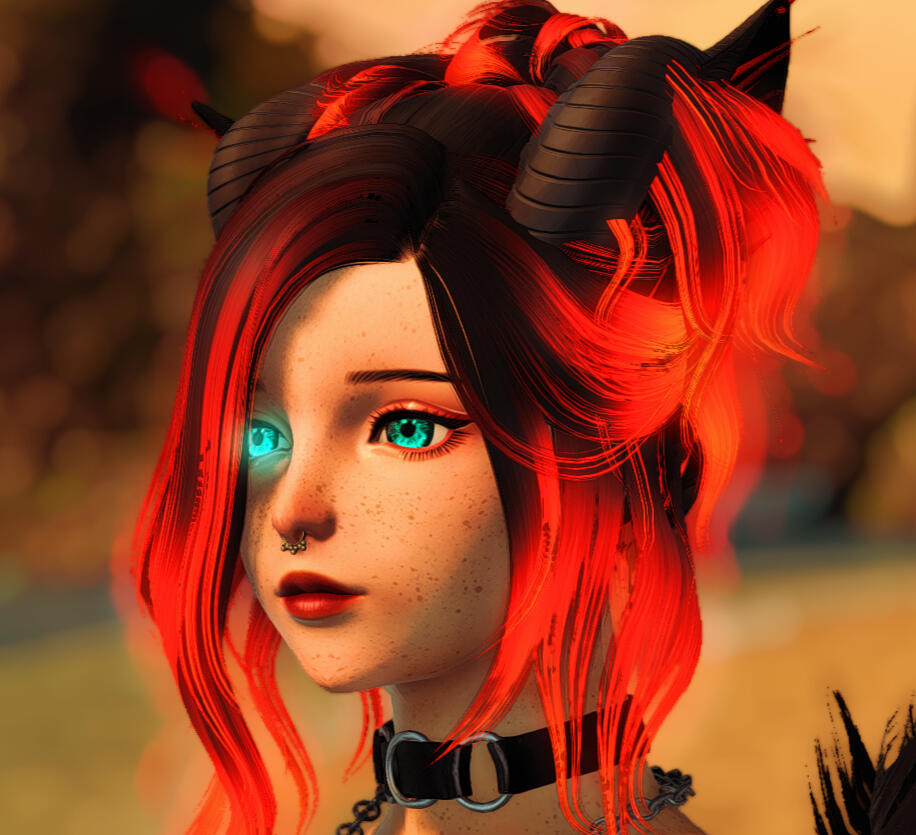
So...how do I make my hair glow?
So, let's get into how to make hair glow at a basic level. The obvious requirement is that you have ALum already set up in Penumbra, but also make sure to set the Hair Framework to "Textures and Materials" as it won't work without this set. For this simplified guide (thanks Ny!) I will tell you how to make your hair glow WITHOUT any actual texture work in Photoshop/GIMP/Photopea or anything else.
Ready Ok cool! Let's get into it!
Step 1 - Get the Texture
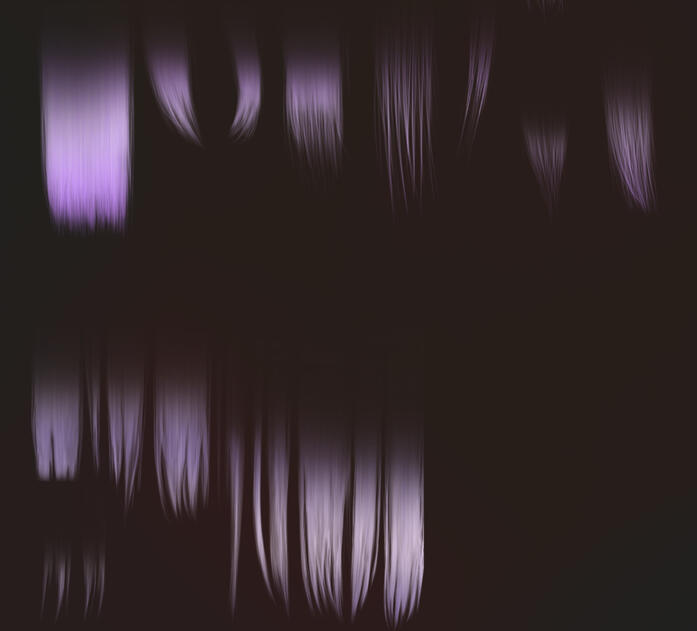
So, first we need to make the mod so we can do all we need from there. To do so, like we have done for other things, is to click the + in Penumbra, name it what you want, and then go to Advanced Settings. Make sure you are using the hair you want to make glow, and then go to the Import from Screen tab. Refresh just to make sure it is all the current mods on your character, and then search for your hair. You will need to get the material and the texture for the hair. I have highlighted the ones to download.ALL OF THIS SHOULD BE DONE FROM THE MOD YOU MADE AND NOT YOUR ORIGINAL HAIR MOD.


Step 2 - Edit Texture
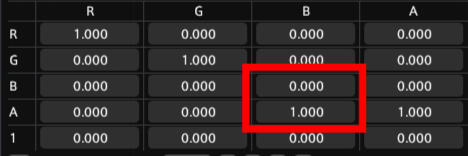
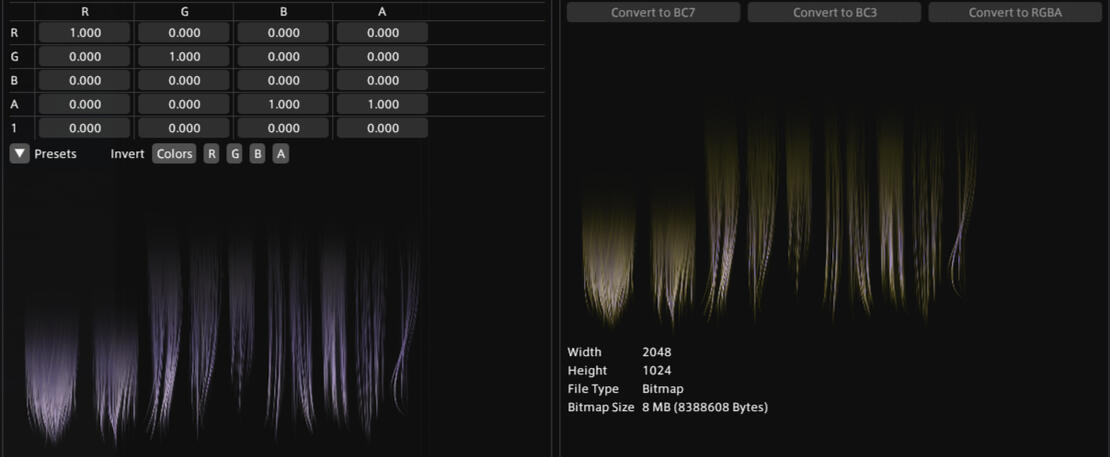
Now, we need to edit the texture to allow the alpha to let ALum provide the glow. Go to Textures, select your texture (there should only be one in there), and make sure the preset is set to "No Transform (Identity)". It should be there be default but just check it to make sure. Then, in the RGB table you see above your texture, set it according to the pic to the right. Pay attention to the highlighted section as that should be all you need to edit. Either way, make sure the table looks like the picture shown. You should also see the original texture and the edited textures next to each other as shown. As long as it does, hit "Save in place".

Step 3 - Edit Material
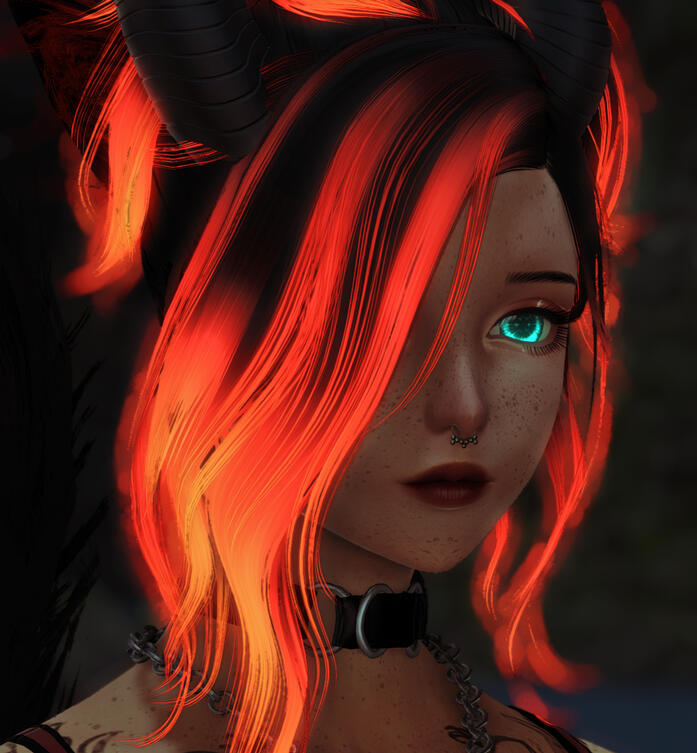
Finally, we need to change the values to make the hair glow. First,make sure your mod is enabled and set to higher priority than your hair. Then, go to the Materials tab, click on the material you saved in Step 1, and drop down the Material Constants section. This section only appears if you have ALum set to "Textures and Materials" like I advised in the beginning. Change the Emissive Conversion options to what you like, and then hit Save to File. As long as the mod is enabled, you should also be able to hit "Reload live preview" and change the values as you want. These can also be changed again at any time. And, with that, your hair should be glowing!


Vanilla Eye Glow (TT Edit)
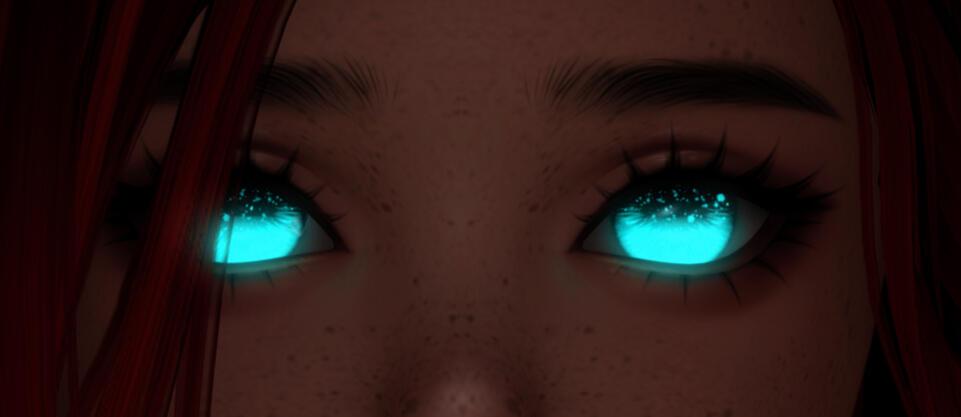
So...while we all wait for Alum to be fixed for Dawntrail, I want to add a guide to still have glowy eyes in the mean time. This guide will be covering the minimal steps done in Penumbra, and the rest of the steps in TT. After this is easier to do all in Penumbra, I will edit this guide!
Step 1 - Get Your Image Files Ready!
Ok so...the first step is to get your image files ready. I will provide an example of all three image types you will need, but you will need to get ones specific to the eyes you want to use for it to work.For this, you will need a normal, a diffuse and a mask texture for your eyes. In Endwalker, most eye mods were based off of what was called a multi, and in Dawntrail you will need to convert that to a diffuse. However, you can do that in Textools by using the Eye Diffuse Creator by going to Tools > Dawntrail Upgrades > Eye Diffuse Creator and selecting your EW multi texture. If you don't know how to get the norm or mask, you might be able to get them from Textools, or you can ask the mod creator, or create it yourself! You can also use Loose Texture Compiler as well! Just feed it the diffuse and it can make a normal or mask! Once you have all three, we are ready to make our mod!The top image is a normal, the middle is a diffuse, and the bottom is a mask. We will go into how to edit the mask on the next step!
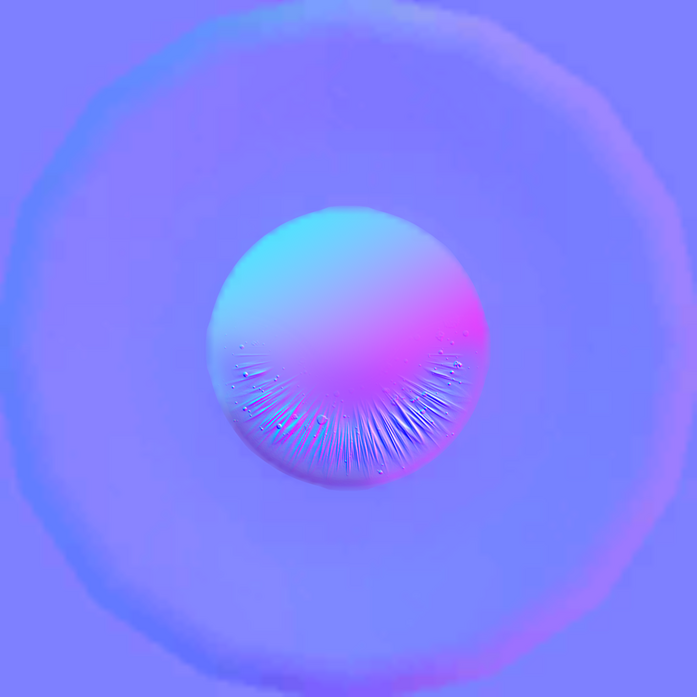
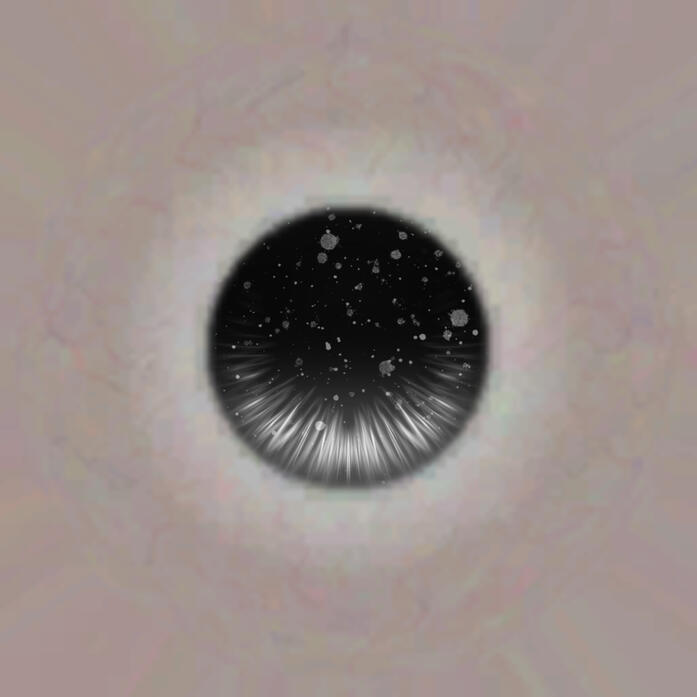
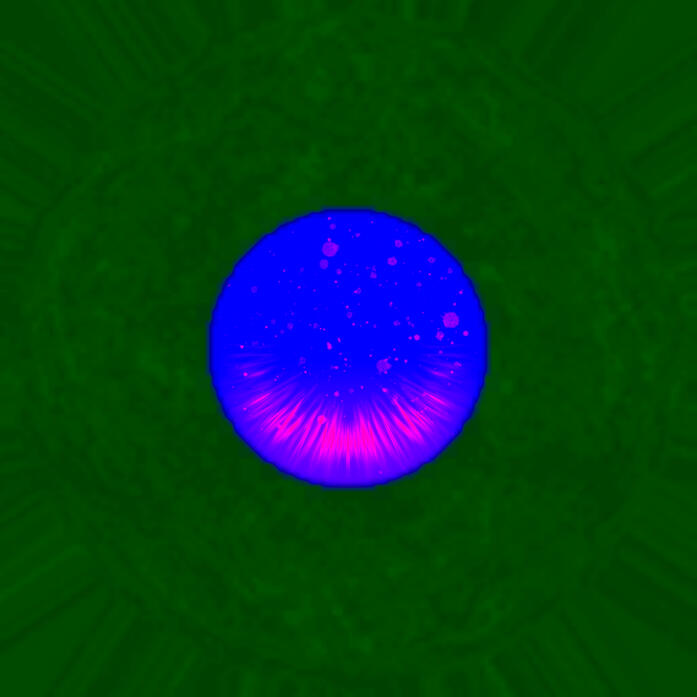
Step 2 - Prepare Mask Texture
So...in order for your eyes to glow you need to edit your mask texture in something like Photoshop. Specifically, you need to edit the RED channel of the texture. You can do that by isolating just the red channel, changing it to greyscale, and then editing from there. The higher the red value the more glow that will be produced!
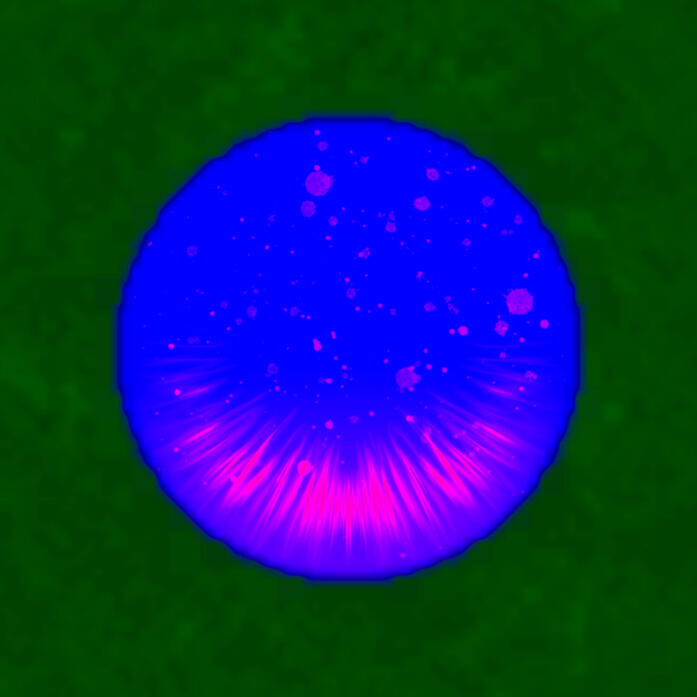
Step 3 - Set up Transaction in TT
Ok, so now we need to set up the transaction in TT to make the modpack for us in Penumbra. To do that, make sure your TT is updated past 3.0. To be sure, just make sure you have the most recent version at the time of reading this. First, in Penumbra, make a new empty mod by clicking the plus in the bottom left and naming your mod. Then, click the "Transaction Status" button in the top right of TT, then "Attach Penumbra" and select the mod folder you just made in your Penumbra Root Folder. That will attach TT to make all changes you make in that mod. Pretty neat, huh?If the transaction status shows as Penumbra Sync, you are good to go! If not, try to go through these steps till it does!


Step 4 - Add Textures to TT
Now, we need to add all three files into TT and save them to the modpack. To do that, you need to navigate "Face" then to your specific race/gender/clan and then click the right drop down for textures. Choose each one, and then click Load, find your specific texture for that type, and then hit "Save to TX(!)" to add it to the modpack. Do the same thing for all three textures.
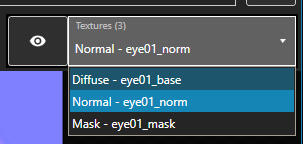


Step 5 - Edit Mask Shader Values
So...now we get into the nitty gritty. This is where you will need to edit values to get the very specific colors you are looking for. Make sure are on the mask texture (1), click the eye on Materials (2), and then click "Edit Shader Constants" (3). Look for the "gEmissiveColor" constant, and change the values as needed. They go in this order:
1. Red 2. Green 3. Blue
Change each value as needed, hit Confirm, and then check the model preview to see if it is what you are looking for. Keep experimenting till you get what you like!
Once you are happy, make sure to save that to Penumbra as well! Once you do, you can cancel out of the transaction in TT and go back to Penumbra. Enable the mod and you should be good to go! Glowy eyes here we come!

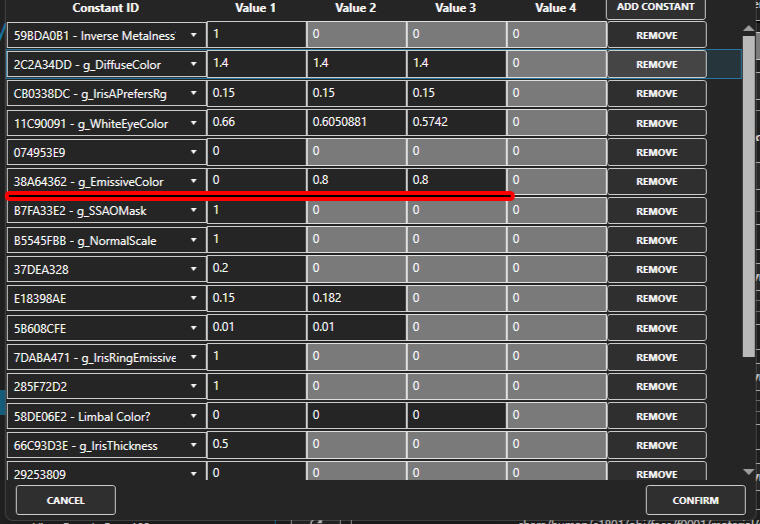
Fixing DT Mods
Have you installed something since Dawntrail and it comes out black, or even worse, flashes like a strobe light to others around you using Mare? Have no fear, because those can sometimes be fixed just by upgrading them in Textools! To do this, you will obviously need Textools, so if you do not have it, get it here!
"Upgrade" The Mod
So, select "Tools", then "Dawntrail Upgrades", then Upgrade Modpack(s)" and find the mod file you want to fix. After you upgrade the mod, it will give you a new option with a _dt at the end of the file name. Save this new version of the mod somewhere you will remember!
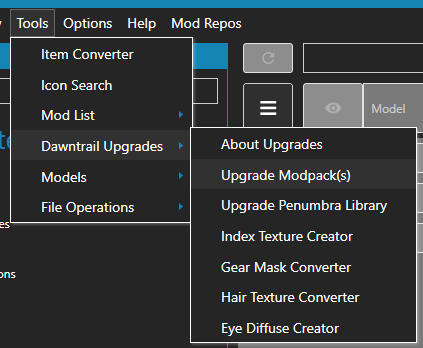
"Upgrade" Your Whole Penumbra Library!
If you haven't even played DT at all with mods, you can try to upgrade your whole Penumbra Library! Just make a new folder close to where your original mod directory is for Penumbra, select Upgrade Penumbra Library, select the new folder, and then let it run!You are using the new folder you created, so make sure to update your folder in Penumbra if you do this option.
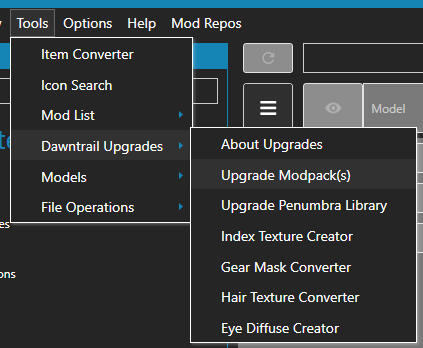
Import The Fixed Mod
If all goes well, you can import the mod just like you import any other mod! However, there is an option in TT to be able to just double click the mod and let TT upgrade AND import the mod for you! Just change the drop down to "Upgrade and Install to Penumbra" on the pop up that shows up when you do!
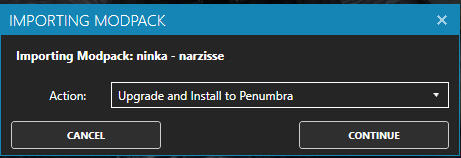
So what are "Mod Associations"?
Have you had two mods that conflict with each other, but you use both of them? And moving items around is a pain? Stop moving mods around and just use Mod Associations! With Mod Associations, you can tell Penumbra to use one mod over a different mod, or even change settings on the same mod for different reasons! For example, in the picture below it turns the wet look I use when in my bikini, changes the sound my footsteps make to heels since I wear heels with this look, turns ON the Ivette x Denim mod and turns OFF Cult's Squishy mod! Let's get into how to do this!
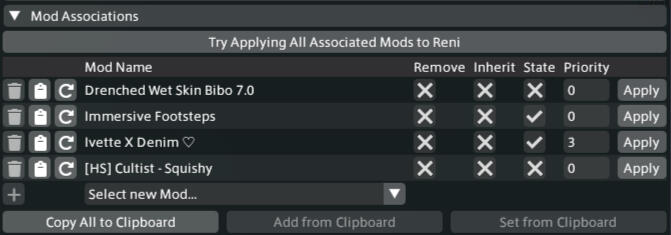
So, how do I set them up?
To set this up, first set up the mods in Penumbra how you would like them to be set for that design. So, for example, I turned my Denim x Ivette shorts on and configured them how I wanted them to be, and I made sure Cult's Squishy mod was turned off. Then, go to Mod Associations, hit "Select new Mod...", find the mod you want to set as a mod association, and then hit the Refresh to the left of the button to ensure it updates to what the mod is currently set to in Penumbra. You can ensure it did by hovering over the "Apply" button and seeing what it says! Now, how about we talk about some examples of how I use it?
So, what do I use them for?
Aside from changing out one mod being enabled or another, my biggest use is using it to change the options selected within the same mod but for different reasons! For example, as seen in the video below, it shows mods being turned on or off because when I am in my bikini, the "Drenched " mod enables and makes me look like I just came out of the water, but when I switch back to my normal clothes, I am totally dry! And, it also shows how when I switch classes my hair and tail change. You may be saying that is standard, but because my hair and tail animates, the colors are set my material and not dye, so it has to change options within my mod to actually change that! Mod Associations can be super fun and powerful!
Coming Soon!


